Showing posts with label Tags. Show all posts

Friday, December 19, 2025

Day 19 - Happy Holiday Doily Christmas Tags


Day 19... Happy Holiday Tags. 
Just in time to add to your Christmas Packages! 

Die cut pattern paper using stitch circle, layer together.
Add pattern paper to matboard, cut mandala doily. 
Emboss whiter stitch circle; add to top. 

Decorate with Holiday Classic Sentiments and stickers from Happy Holiday Collection.
Add twine hangers. 
Enjoy Pam

Supplies
Sizzix Vault Holiday Classic Die
Stacking Stitch Nesting Circle Die
Sizzix Matboard
Echo Park Happy Holiday Collection
White Card Stock
Natural Jute Twine
Glossy Accent

The Mandala Doily Die is available in Eileen Hull Design Shop HERE

Thursday, December 5, 2024

Day 5 - North Pole Postage Tags


Happy to Day 5 of my Christmas Event...we are making tags!!!
How fun!!!
Did you know that Scrapbook.com has freebies!!!
Recently they offered Simple Stories North Pole Ephemera Pack as a freebie!!!
Now that is amazing...so I decided to use bits and lots of the pieces to create tags with! 


Begin by die cutting the premade tag using Postage Die


Emboss with the Lace Embossing Folder


Adhere prepared embossed tag to brown card stock. 


Add ephemera from the North Pole Ephemera Pack


Add ribbon, twine and small ornaments to top.
HINT: Crinkle ribbon and twine with a mist of water, crinkle up, hold with clip til dry.


Enjoy creating Christmas tags or just every day tags all year long. 
Make sure to check out Scrapbook.com for all your shopping! 
Enjoy Pam

Supplies:
Brown Card Stock
2 - Premade Stamp Tags 
Brown Ribbon
4 Small Ornaments
Natural Twine

Friday, June 3, 2022

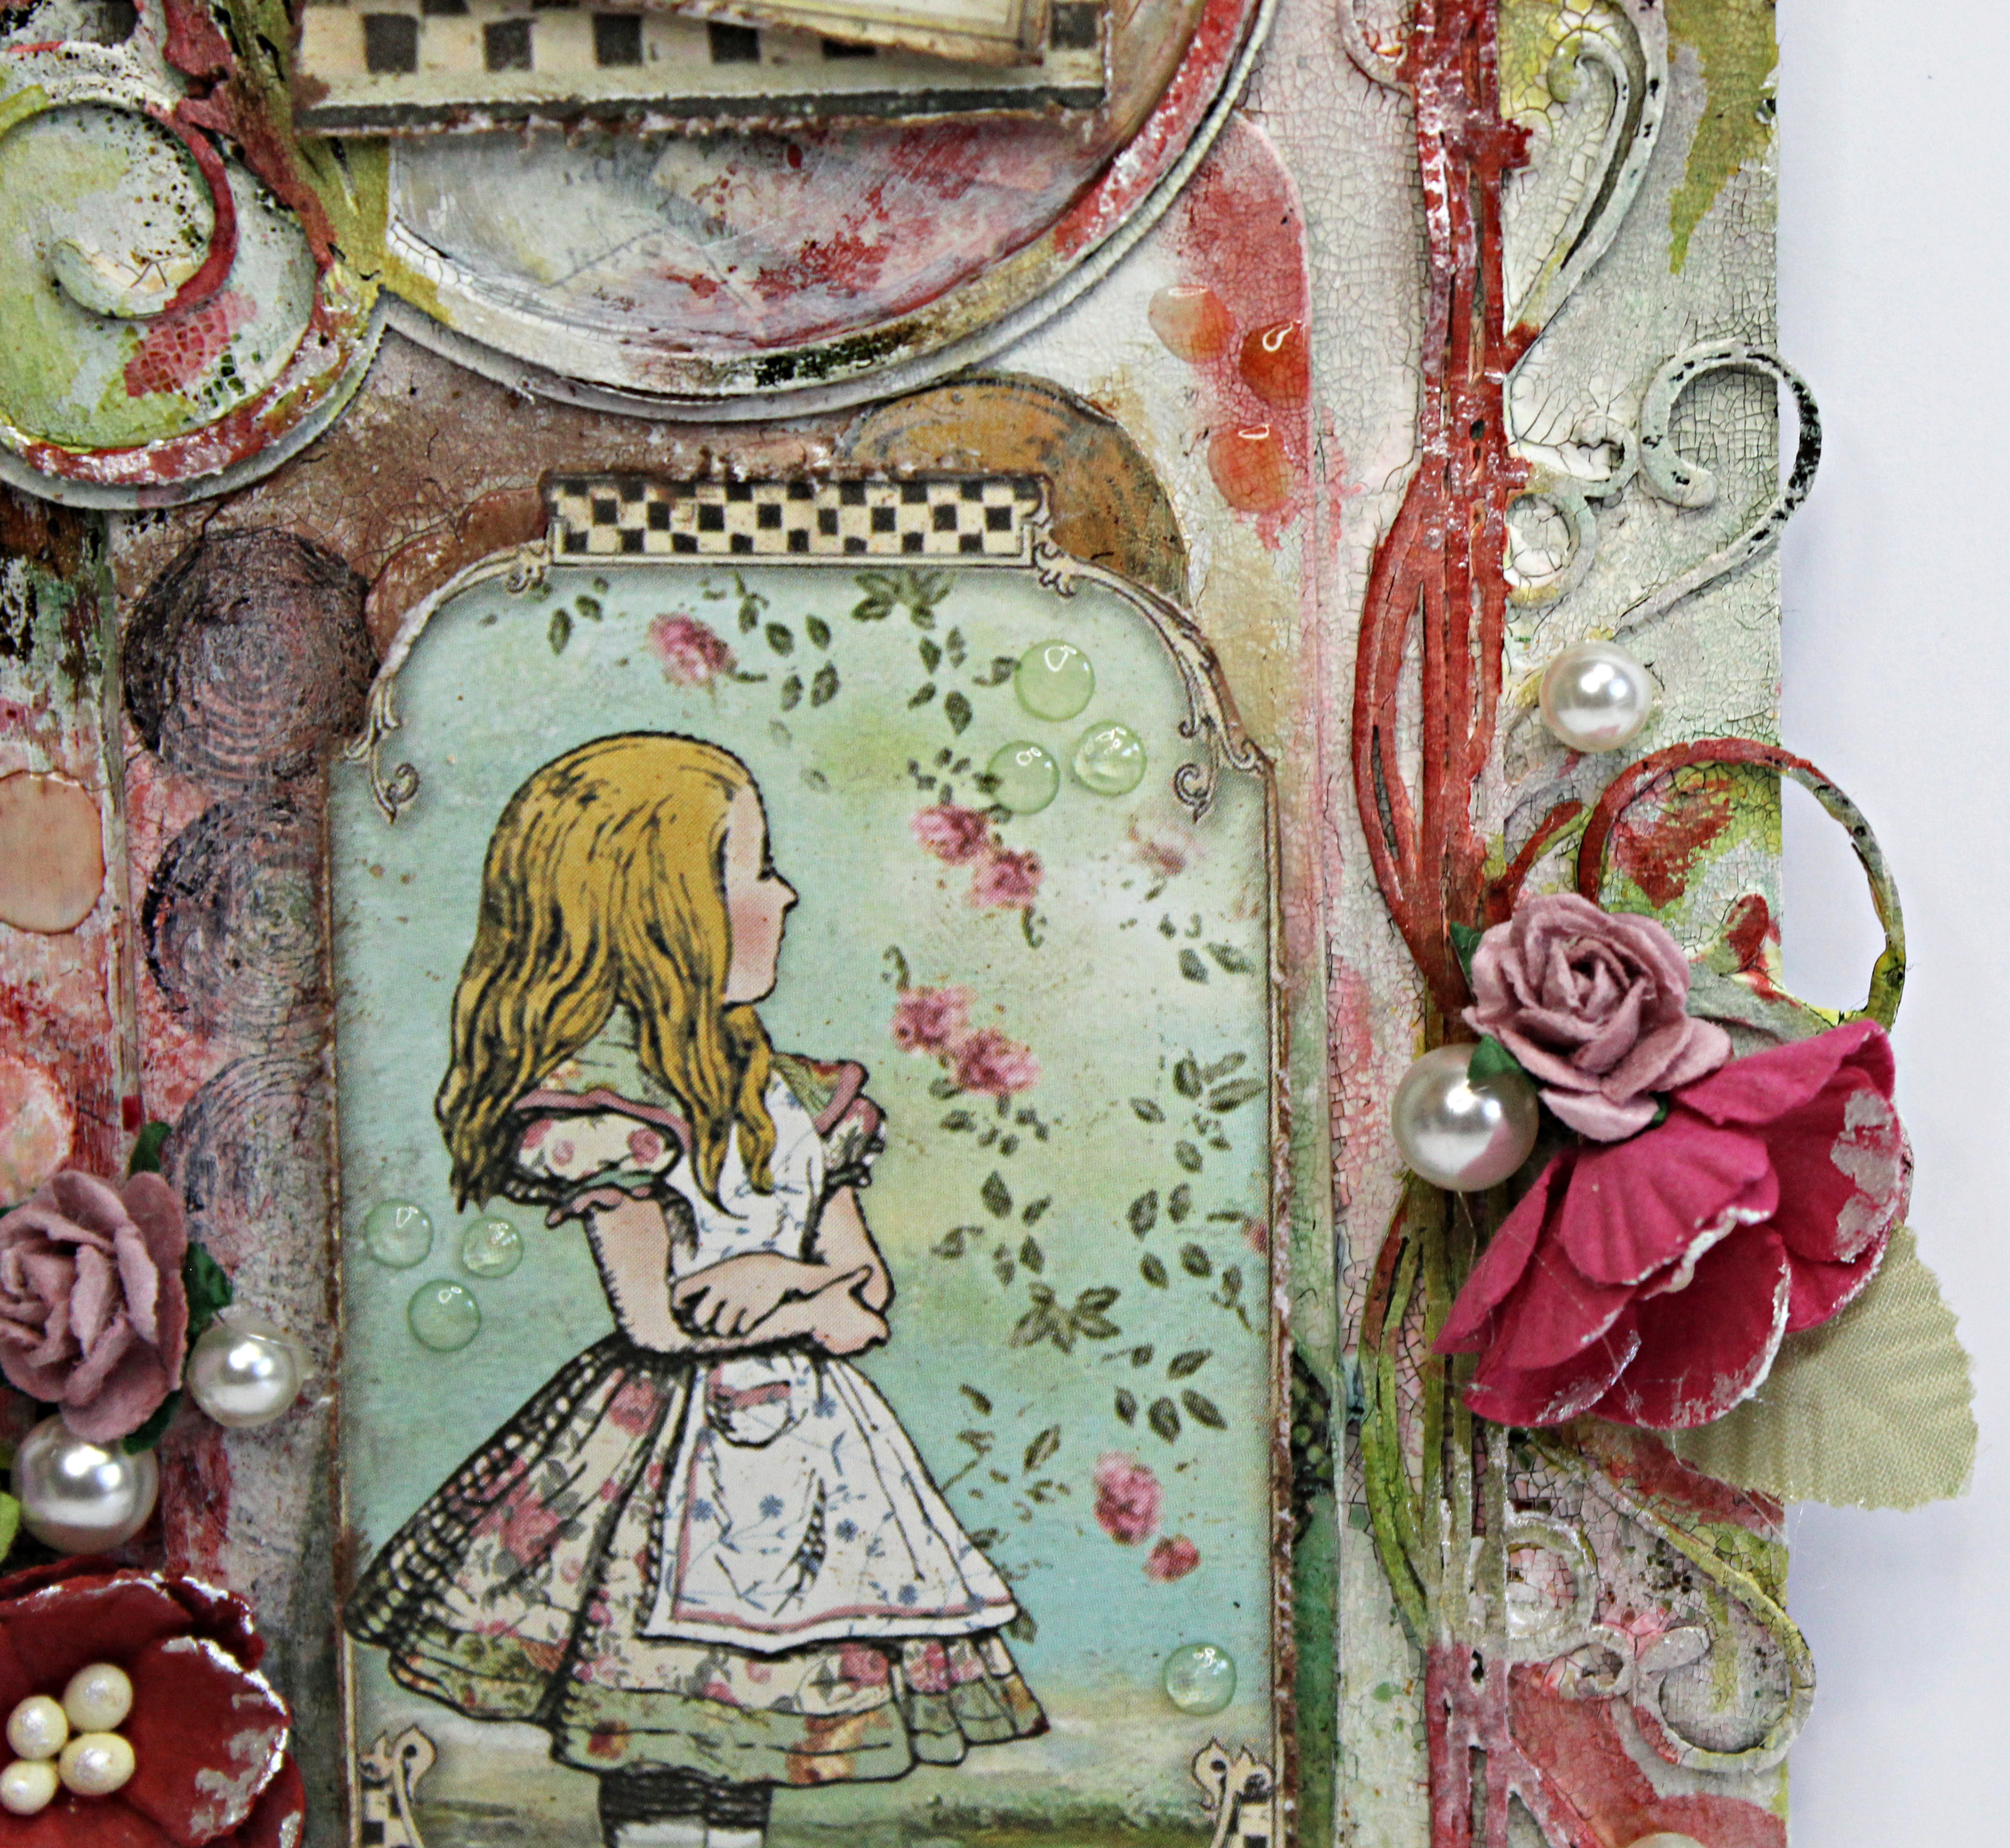
Wonderland Mix Media Tag


Wonderland...Is better when you're completely lost!
What a truthful statement.
When you are creating or at least for me I am in my Wonderland!
Completely lost, completely absorbed, completely content. 
So let me help you get lost by creating a "Wonderful" Mix Media Tag


Begin by apply Crackle Paste to top of a large chipboard tag. 
Weave paper strips on top of prepared tag. 
(Inspired by Maremi's Creative Cafe Challenge-Marta Lapkowska)

Photo 1: Lightly apply crackle paste over top. 
Photo 2: Layer two more smaller tags and Victorian Layered Border to top; lightly apply crackle paste. 
Photo 3: Add small ephemera to top of tag and frame; add open frame to top. Lightly apply crackle paste to top. Stamp border with black ink. Lay stencil on tag; apply crackle paste. Dry

Photo 4 and 5: Apply layers of distress inks and sprays to top of prepared tags
Photo 6: Add small ephemera pieces to top of tag. 


Add small metal stars to prepared tag.


Add a few flowers on each side of tag. 


Add bow and mini pearl pieces to tag. 


Add key to tag; apply White Frost Metallic Lustre lightly to bits and pieces of tag. 


Add glossy accent dots here and there to tag; dry. 


I hope you are inspired to get lost in your "WONDERLAND" of creating! 
Enjoy Pam

Supplies
Gypsy Soul Laser Cuts Extra Large Tag, Stagger Small Tags and Victoria Layered Border
Stamperia Through the Looking Glass Pattern Paper
Blank Page Muse Beyond Borders Stamp Set
Wild Whisper Honeycomb Stencil
Deco Art Crackle Paste
Ranger Distress Sprays: Rustic Wilderness, Kitsch Flamingo, Saltwater Taffy, Black Soot, Rusty Hinge
Distress Refills: Barn Door, Vintage Stain, Rustic Wilderness
Ranger Glossy Accent
Ranger Archival Black Ink
Deco Art White Frost Metallic Lustre
Flowers
Metal Stars, 
Pearl Beads
Grey Ribbon

Wednesday, December 11, 2019

ChristmasTags and Ornments with Southern Ridge Trading Company

  
Happy Holidays and Merry Christmas!!! I am sharing a few fun tags with removable ornaments using Southern Ridge Trading Company holiday chipboard pieces! 


Begin by covering chipboard tags with pretty pattern papers and border strips!


Adhere Southern Ridge Snowflake Wreath Small  to bottom of prepared tags!
 (HINT: Make sure to lightly adhere the  Snowflake Wreath Small  to tag since they are to be removed for the ornament gift!)


Adhere pattern paper to center of two of the Southern Ridge Wood Christmas Ornaments! 
Add bows to top of each ornament. 


Paint and emboss bell and deer from Southern Ridge Deer Christmas Mix using embossing powder and embossing ink. 
Adhere to top of prepared ornaments.


Adhere prepared embossed chipboard pieces to top of Snowflake Wreath Small .


Paint and emboss Joy and Noel from  Southern Ridge Words of Christmas using embossing powered and embossing ink. 


Adhere prepared words to pattern paper mats; adhere prepared mats to top of tags. 


Adhere number disc to bottom of tags. 


Die cut black card stock doilies; adhere under tag back!


Apply Marshmallow Rock Candy to snowflakes and doily; heat set. 
Adhere to top of tag! 


I hope you have enjoyed the tutorial on how to create beautiful tags for your packages...
 REMEBER...
 to tell the recipient that the ornament comes off the tag for their tree!!! 
ALSO... 
the tags are perfect all year long...just change the Christmas theme to another. 
Add a magnet on the back of the ornament piece to create fun addition to your home.
 Enjoy Pam

Supplies:

Other Supplies:
May Arts Natural and Red Twine, Red Ribbon
Xyron Adhesive
Snowflakes
Embossing Ink
White Paint
Black Card Stock


****Products Linked in Affiliate Supply List for convenience****
DISCLAIMERS
This blog is compensated to provide opinion on products, services, websites, and various other topics. Even though the owner(s) of this blog receives compensation for our posts or advertisements. I always give my honest opinions, findings, beliefs, or experiences on those topics or products. The views and opinions expressed on this blog are purely my own. Any product claim, statistic, quote or other representation about a product or service should be verified with each manufacturer, provider, or party in question/This blog contains affiliate links, clicking and shopping through these links helps to support and run Pam Bray Designs - Scrapbook Flair Blog at no additional cost to you. Today's features are Southern Ridge Trading Company Products.

Monday, September 23, 2019

Day Dreams and Ice Cream Mini Album with Tags - Authentique


Day Dreams and Ice Cream...YES!!! I could easily fill my days with both ideas! I am sharing how to create a 5" x 6" mini album with tags using Authentique Confection Paper Pack celebrating daydreams and ice cream.


Begin by scoring a piece of 5" by 12" piece of the Confection paper at the 6" mark.


Create a pocket page for the tags by placing adhesive on the 5" seams; fold together at the 6" mark to create pocket page.


Score prepared pocket page at the 1" mark to create bind.


Create 6 pocket pages using the above steps.


Adhere the 1" bind together; decorate bind with a piece of Confection pattern paper.


Add decorative border strip to front of cover. Adhere brown strip doily to cover along with an Epherema Card from the Confection Collection.


Punch 2 holes in prepared bind. Tie ribbon bow.


Cut ten 4 1/2" x 4 1/2" mats from Authentique Spectrum brown strip paper; corner punch all four corners.


Adhere prepared mates to each of the inside pages.


Decorate pages with the Confection Elements and Epherema Cards, leaving places for photos.


Cut tags to fit inside pocket pages; decorate with Confection Elements and Epherema Cards.


Fussy cut ice cream image from second Confection Epherema Card; add to front of cover with pop dots. Add small crochet doily under card.


Cut doily from Spectrum brown strip paper; adhere under Epherema Card.


Add metal spoon, flowers and tan ribbon to front of cover. I hope you create a few mini albums and tags using your favorite Authentique Collections. Enjoy Pam

Supplies:
Authentique Confection Collection
Authentique Spectrum Brown Stripe Pape
Momenta Doily Die
Xyron Runner with Permanent Adhesive
May Arts Brown Ribbon and Tan Twine
Metal Spoon
Small Crochet Doily Circle
Flowers
Deco Art Corner Punch
Scallop Flower Punch
Pop Dots


****Products Linked in Affiliate Supply List for convenience****

DISCLAIMERS

This blog is compensated to provide opinion on products, services, websites, and various other topics. Even though the owner(s) of this blog receives compensation for our posts or advertisements.I always give my honest opinions, findings, beliefs, or experiences on those topics or products. The views and opinions expressed on this blog are purely my own. Any product claim, statistic, quote or other representation about a product or service should be verified with each manufacturer, provider, or party in question.This blog contains affiliate links, clicking and shopping through these links helps to support and run Pam Bray Designs - Scrapbook Flair Blog at no additional cost to you. Today's features are Authentique Products.