Friday, February 23, 2018

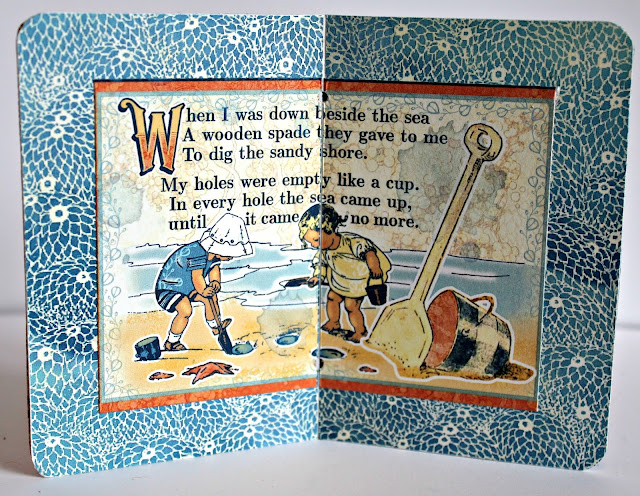
The Sun, Sand and Sea Passport Album with Graphic 45

Disclaimer Notice: I’ve received products/compensation as part of the Graphic 45 Design Team. This project however, is 100% my own project! Some of the links in this post are affiliate links. I explain more here.


Hi Graphic 45 Fans! The chilly weather is making me long for summer, the beach and sand, seashores and collecting seashells....I could go on and on and on...sigh! The Sun Kissed Collection for Graphic 45 just puts a smile on my face with the anticipation of warmer weather and travel. Are you ready for warmer weather? I created a travel size Sun, Sand and Sea Passport Album....never to early to start those summer plans!


Begin by cutting chipboard using the passport die; adhere Graphic 45 Sun Kissed pattern paper and Epherema cards to inside of cover.


Add fussy cut images to pages using pop dots.


Fold larger Epherema Cards to pages to add extra space for journaling or photos.


Create small pockets to slide tags into.


Add borders to top of pockets and pages.


Create hidden pockets behind mats by only adding adhesive to three sides of mat.


Layer circle die cuts from pattern paper to for photo mats or journal cards.


Add flower soft to center of flowers to create added dimension.


Tie pages inside of passport album with ribbon.


I hope you have enjoyed the tutorial today but I am also sharing it on my You Tube Channel if you need to see it again. Pam

Supplies:
Graphic 45 Sun Kissed 12 x 12 Paper Pad
Graphic 45 Sun Kissed Epherema Cards
Sizzix Passport and Hello Doily Die
Flower Soft Citrus Crush
May Arts Ribbon and Twine
Metal Clips
Chipboard
Adhesive

Wednesday, February 21, 2018

A St Patrick's Day Greeting with Candy


Hi Authentique Fans! I am sending you a little Authentique luck with  A St Patrick's Greeting with a little sweet treat! The Authentique Shamrock Collections is just a sweet collection full of hues of green with splashes of pink and lots of vintage images! 


This fun filled trio-fold card measures 6 1/2" x 5" when it is finished. There is plenty of space to write a fun sentiment inside along with a pull our waterfall photo card that could be added to your planners, scrapbook page, or have as a keepsake.


Begin by folding a piece of 6 1/2" x 12" pattern paper at the 4 1/2", 4 3/4", 9 3/4", and 10" marks.


Adhere mats and border strips. HINT: Make sure to form pockets with the border strips at the bottom of the card  by only adhering the strips on 3 sides to create the pockets.


Add fussy cut vintage images, stickers and Epherema Cards to inside of card.


Add a few stickers to inside using pop dots and gemstones.


Add a separate  3 1/2" x 5 1/4" Waterfall card to place in the pocket.


Decorate each page with stickers, scallop border at the bottom and gemstones.


 Create a tag; add to front of card with pop dots... HINT: This a fun place to hide a gift card!


 Add a ribbon bow, a few fussy cut images and stickers to front of card with pop dots.


Create a few planner picks with stickers and paper clips... HINT: Planner picks on paper clips will help hold the card closed.


I couldn't help to share with you a fun sweet treat made using 2 tags and the Make it 3D die!


Photo 1: Cut 2 tags that will measure to the size of the box you are using!
Photo 2: Cover front and back of tags with pattern paper.
Photo 3: Create box
Photo 4: Add prepared tags to two sides of box. Add pattern paper to open side and inside of box.


Decorate sides of prepared candy box.


Fussy cut images add to sides of box with pop dots along with stickers


Fill with your favorite candies; tie at top with twine and ribbon and a tag from the Shamrock Detail Sheet!


Thank you for stopping and may the Luck of the Irish be with you!

Authentique Supplies:
Shamrock Collection Paper
Emerald Details Sticker Sheet

Sizzix Make It 3 D Die
Scallop Border Punch
MayArts Ribbon
Candy


Tuesday, February 20, 2018

Friendship is the Sunshine of the Soul Mixed Media Tag with Little Birdie Crafts


“Friendship is Sunshine for the Soul” and what better way to share that sunshine but to play with Little Birdie Crafts Mixed Media Sprays and Stencils. I am sharing how to just do that with 4 sprays, 2 stencils, and some flowers from your Little Birdie Crafts stash!

Here’s What You Will Need:
Stop by the Little Birdie Craft Blog to see all the fabulous details! Pam


Wednesday, February 14, 2018

"Love" Wreath with May Arts Ribbon


Happy Valentine Day!  I am sharing  a "Love" Wreath using  May Arts Fabulous Spring Floral 1.5" Ribbon, it is just so pretty and would make a fabulous wreath or anytime of the year.


Begin by wrapping a 9" heart wreath with the Spring Floral 1.5" Ribbon..


To form the bow...fold loop, twist at center and fold loop again. Repeat until you have 5 loops on each side.


Wrap at center of formed loops and tie in a knot.


Adhere to Spring Floral Bow to prepared wreath.


Emboss "Love" chipboard with embossing ink and embossing powder.


Cut a piece of Spring Floral ; Tie at both ends. Wrap around prepared "Love" Chipboard.


Glue bow and flowers to prepared wreath.


I hope you are inspired to make a "Love" Wreath using May Arts Ribbon...be sure to check all of May Arts Ribbon fabulous ribbon. Pam

Supplies:
May Arts Ribbon: Spring Floral 1.5" Ribbon 518-15-17
Emerald CreekSupplies: Sweet Valentine  and Wysteria Wonder Embossing Powder
9" Heart Wreath
Love Chipboard
Floral Flowers and Leaves