Friday, January 30, 2015

Hugs and Kisses Candy Box Artist on the Block

 Wow...more love on the blog today using Eileen Hull fabulous Artist Block Die from Sizzix.
 I wanted to share with you how to make them using all those cardboard boxes that your might have laying around. To begin with just cut pieces of the cardboard to fit the die and run through your die cut machine. Once cut....fold at the fold lines and pull carefully pull off some of the paper from the corrugated insides. I took white paint and dry brushed over the cardboard and then formed my Artist Block before I decorated it.
 I stamped four hearts from my stamp set and colored them in using paint I had diluted, allow them to dry thoroughly and glue to chipboard, cut out and wrap with wire.
Place them on to distress pattern paper using pop dots. 
To finish off my Hugs & Kisses box I stamped my sentiment on my pattern paper using Black Indian Ink and die cut it out using Eileen Hull Label Die. Add to the top with pop dots once inked with Tim Holtz Tea Dye Distress ink, tie bow with tan twine. 
Supplies:
Teresa Collins Every Day Moment Paper
Hero Arts Four Hearts Stamp Set
Hero Arts XO Stamp Set
Craftwell Cut N Boss
Xyron Adhesive Dots
Xyron Teresa Collins Mega Runner
Black Indian Ink
Tim Holtz Tea Die Ink
Cardboard
White Paint
Red Paint
Wire
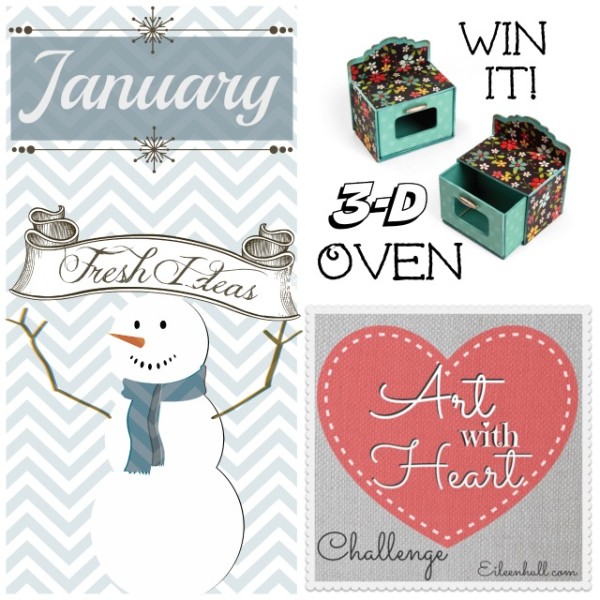
Make sure to check out the Art From the Heart Challenge on Eileen Inspiration Blog and participate in the monthly challenges.
http://www.eileenhull.com/blog
Hugs Pammejo

Monday, January 26, 2015

Love Banner with Xyron

Wow...can you believe it is time to think about Valentine decorations and gifts, well today I am sharing with you an easy banner I created using one of my new "loves" from Xyron...the Teresa Collins Mega Runner. 
I began by cutting 4 pieces of 4 x 6 cardboard from an old box, corner punch them using a corner chomper and painting the edges using Deco Art White Gesso.
I used my Teresa Collins Mega Runner and applied the tape to the cardboard, love, love, how easy it glides over the pieces and drops the adhesive with out tearing up the cardboard and paper that I am using, I guess that is why I love it so much. Once I had my adhesive applied I placed my embossed white paper to the top of each cardboard piece. (NOTE: Each banner is made the same, so what ever I did for one of the banner I did for all four, excluding the letters, lol)
 BUT...I have a secret....between my Mega Runner and the Create A Sticker
 I think it is a close tie to my favorites....love how I can run multiples through the machine and it is so fabulous for intricate die cuts.
Anyway...after you have all your die cuts from Spellbinders cut just make an assemble line, get your fabulous Teresa Collins Mega Runner from Xyron and adhere each of the pieces to the cardboard. 
Place a stripe the strip you ran through the Create A Sticker to the top. Add both a strip of pattern paper and scallop border to the top of each banner using your Teresa Collins Mega Runner. 
 Here is a closer look at each banner...Love all the layers, don't you?
 To make you letters...use you Xyron Glue Stick and cover each letter with glue.
 Layer each letter with pattern paper, turn over and remove the excess paper with an xacto knife.
 Adhere to the center of each of brown embossed pieces that are on pop dots.
I hope you make yourself a "Love Banner" using my super easy steps and of course your fabulous Xyron Adhesive. Sending you love and hugs. Pammejo
Supplies:
Xyron Teresa Collins Mega Runner
Xyron Create a Sticker
Xyron Glue Stick
Carta Bella Devoted Papers
Craftwell Cut N Boss
Couture Creations Cheerful Embossing Folder
Spellbinders Lattice Floral Ribbon Treader Die
Spellbinders Lattice Rectangle Die
Deco Art White Gesso
Clear and Red Gemstones
Brown Ribbon
Cardboard
White and Brown Cardstock
 

Tuesday, January 20, 2015

Gift Box with Eileen Hull's Inspiration Team

 Hi...today I am sharing with you how to combine several of Eileen Hull Sizzix dies together to form a fabulous gift idea. Eileen Hull’s January Art with Heart Challenge is up and running. We would love to see your projects and you could win a new Vintage Kitchen 3-D Oven die!
art-with-heart-january-challenge-fresh-ideas-sizzix-prize-pack
our theme this month is "Fresh Ideas", so make sure to check out the Art With Heart Challenge and play along.
a
 I placed a Medium Block Die using the XL Scoreboard Block Die and mat board that was covered with Graphic 45 French County Country Collection. I repeated with making a Candy Drawer using the Sizzix Candy Drawer Die from Sizzix.
 I punched and stamped several tags to place inside of the box. I decorated them with corresponding paper and die cuts from the Kitchen Label Die Set. I repeated with the candy drawer and wrapped a few candy bars with the paper, fussy cut some of the sunflowers and place them on the candy bars with pop dots.
 I added a tag that I had crumpled up, inked to the top of the block using Xyron Adhesive dots, added a fun bow, a metal embellishment and some a fun bling center to my sunflower.
I love to fussy cut so I cut several of the roosters from the Graphic 45 French County papers and added them to the top of the labels I cut from Sizzix Kitchen Label that is part of Eileen Collection, to finish my project I added a few small bead legs to my Gift Box. I hope you enjoy my Gift Box and try to combine your dies together to create a fabulous gift. Hugs Pammejo
Supplies:
Graphic 45 French Country
Chestnut Roan Ink
Random Ribbon, Bling, Beads

 Now it’s your turn to share some of your “Fresh Ideas” in the Art with Heart Challenge for a chance to win the 3-D Oven die from Vintage Kitchen!  Link your projects and see what everyone else is creating HERE.

Wednesday, January 14, 2015

Smile Card with Craftwell

Smile...today is another fabulous day to share with you Teresa Collins Memory and Thankful Holiday Pocket Dies Set using Craftwell Cut N' Boss.
I began by first running the Honeycomb Die through my Cut N' Boss using the following platforms
I love using my Xyron Create A Sticker Machine because it is fabulous for these intricate die cuts. 
Place it on the card base that you had prepared using Crate Paper papers. 
Add the ribbon to the front of your card, using the Xyron Sticker Maker makes it so easy.
Cut a two flowers and two leaves out using the dies and papers. 
Place on the front of your card once you have your flower shaped, add a button that you tied twine to and place leaf under flower. 
Stamp a fun sentiment to the inside of card and add the second leaf.
Well I hope you enjoyed card and I hope it made you Smile!!! Hugs Pammejo
Supplies:
Teresa Collins Thankful Holiday Pocket Die Set
Teresa Collins Memory Pocket Die Set
Craftwell Cut N Boss
Crate Paper Random Paper Pad
Technique Tuesday Stamp
Stampers Anonymous Good Thoughts
Xyron Create A Sticker
Xyron Sticker Maker
Teresa Collins Mega Runner
Random Ribbon, Twine, Card Base, Button
http://www.pammejoscrapbookflair.com/

Monday, January 12, 2015

Day Planner with Craft Hoarders Anonymous Challenge Blog-Choose Your Challenge

 Welcome to the first Craft Hoarders Anonymous Challenge of 2015.... so to begin with you will need to head over to the Craft Hoarders Anonymous Challenge Blog
 and check out the changes that have been made for doing the challenges...click HERE!!!
NEXT...
Decide on you project...
and 
then check out the chart to see how to participate in the challenge...
MAKE SURE TO CHOOSE AT
LEAST ONE FROM EACH CATEGORY!!!
I made a Day Planner to place my design projects schedule in but you can use the same idea to make it into any type of planner that you wish.
I began by purchasing an inexpensive book from our local craft store for a dollar.
I took the front and back off the book and painted it with Black Paint from DecoArt...
Once the paint was dry I put the book back together and added my Graphic 45 ABC Primer papers to the front, back and inside covers. I inked all the edges with Chestnut Roan.  I added a fun border that I made from a EK Success Punch.
I distressed my journal block and mat using a distress tool, inked the edges and added it to the front of my Day Planner once I had my Tim Holtz Rub Ons in place using pop dots. I added Tim Holtz letters and numbers to the front along with a metal arrow. 
I added on small flower that I made using flower pieces from my stash along with adding a fun bow.
I went through my planner and wrote all the dates in with a LePen and added the month tabs to the side of the beginning of the month pages. 
I hope you enjoy my Day Planner and try making yourself one or even to make for a gift. I hope you play along with us at Craft Hoarders Anonymous Challenge Blog and make sure to check out the design team for more inspiration and REMEMBER: check out the new changes along with the chart for your project. Hugs Pammejo
Supplies:
Journal
DecoArt Black Paint
Graphic 45 ABC Primer Collection
 EK Success Border Punch
Doily Die
Tim Holtz Letters, Numbers, Rub-Ons
Random Metals, Brads, Ribbon 
ColorBox Chestnut Roan
Xyron Adhesive
Design Team

Saturday, January 10, 2015

Day Two - Vintage Travel Die and Embossing Folder Reveal with Eileen Hull

 Day Two of CHA!!! I am sure the Vintage Travel Dies and Embossing Folders are all a buzz by now!!! They are simply fabulous.
The Inspiration Team has been giving you a sneak peek at some of the dies and folders that will be offered in this collection...so I hope you will check out the Inspiration Design Team post as well as check out Eileen Hull Blog.
I shared my projects that I sent to Anaheim yesterday...so you can check out my post HERE!!! But I had to share with you this book die that will be released in April....all I can say is I have to have it!!!!
Inspiration Design Team:
Lisa -