Monday, November 25, 2013

Fall Candy Bottle with Couture Creations

Hard to believe that Thanksgiving is Thursday....but it is never to late to make a party favor or two....so today I would like to share with you the Candy Bottle I made to place at each guest place  setting.
I started with a small bottle and filled it with candy....
Taking some pretty pattern paper that I used a decorative punch on I placed Double Sided Tape on each piece and set them to one side until....
 I ran a piece of Core'dinations paper through my embossing machine using the Endless Embossing Folder....
 sanding it off lightly with my Sanding Block.....
I added the borders that I previously prepared to the embossed piece. 
Placing a piece o the 18mm x 50mm Double Sided Tape at the end and a few pieces on the back side of the embossed band... 
This will help secure it to the bottle and make a nice finished closure to the border band when you place it around the bottle
Cut one of the Scallop Circles from pretty pattern paper and place on the lid o the bottle with your Double Sided Tape
Embossing a few of the leaves using the Endless Embossing Folder, sand them with your Sanding Block and fussy cutting each leaf out, setting them to one side to use on your Candy Bottle lid.....
Cut out several of the Sunflower from the Sunflower Nesting Die, spray with water, wad them up and allow them to dry completely....
Add the leaves that you had set to one side to the top of the bottle, glue your Sunflower pieces that you have straighten up a bit to the top of the lid, make sure to keep them scrunched up....add a bronze gemstone to the center. 
Wrap the brim of the lid with some pretty ribbon, add a few tags or even your guest name to the bottle and place at each of your table setting or give away after the days event. I hope you have a fabulous and joyous Thanksgiving. Hugs Pammejo
 Couture Creations Supplies:
CO723212 Sunflower Nesting Dies
CO723041 Scallop Circle Nesting Dies
CO723047 Scallop Rectangle Nesting Dies
CO723294 Endless Embossing Folder-All Occasion Collection
CO721965 Double Sided Tape
CO721983 Double Sided Tape
Sanding Block
Premier Cutting Mat
Precision Trimmer
Handheld Essentials
Precision Scissors
Bronze Gemstones


Saturday, November 23, 2013

You and Me with We R Memory Keepers Harvest Collection

When I scrapbook I love to make double page layouts so that the papers compliment each other along with the photos and embellishments....I think that is what I love most about scrapbooking is each of our unique styles....SO today I would like to share with you my complimentary WeR Memory Keepers layout that goes with the one I made two days ago, if you would like to see it please click HERE.
One thing that most of you know is if you are a frequent visitor to my blog is how much I love to fussy cut them images out of the pattern papers to create my own embellishments...so if you notice the flowers and leaves that is exactly what I did from a sheet of the WeR Memory Keepers Harvest Colletion.
To get some mix medium looks to my layouts I love to use stencils along with paint...it gives just a bit of creative interest to the card stock don't you think?
Again here is a few more of the fussy cut flowers but notice how I cut around the embossed flowers from the WeR Memory Keepers Harvest Embossed Sticker and added a complimentary piece of paper to the corner...I did this because I really wanted the flowers to pop off the page and I believe it work....makes me happy, happy, happy when you see your layouts come together. 
SO...if you would like to see the details for this layout please click HERE and make sure to check out the WeR Memory Keepers Blog....Hugs Pammejo
Supplies:
WeR Memory Keepers Harvest Collection
Clear Scraps Stencil
Acrylic Paint
Paint Brush
Chippie
Chestnut Roan Ink
Pop Dots
Adhesive

Thursday, November 21, 2013

Autumn Harvest Layout with WeRMemory Keepers Harvest Collection

Wow we are really into fall weather here in Memphis....one day it is bright and sunny and the next cold and wet....so what a perfect time to work on some fall layouts....I made mine from the sketch you will see at the bottom of the post....I just fell in love with the sketch design so I got out We R Memory Keepers Harvest Collection and proceeded to make it. I started with the Crow paper, stencil and paint brush....I then dry brushed the paint across the stencil to achieve my background paper.... added the other beautiful papers from the Harvest Collection.
I think the embossed stickers are just fabulous...I added a few of the embossed flowers using pop dots and gemstones as well as sheer ribbon bow.
My "Harvest" sentiment is actually from the bar code from the Harvest paper...so always pay attention to the bar codes, you never know what you may find. 
 Here is a closer look at the dimension of the flowers as well as some other cool embellishments I added.
I hope you enjoy the sketch, it was shared on the Studio Calico Blog, let me know if you try it. Hugs Pammejo
Supplies:
We R Memory Keepers Harvest Collection: 
We R Memory Keepers Life Document Die Cut
Studio Calico Wood Veneer
Want2 Scrap Feather
Prima Light Bulb
Tim Holtz Drawer Pull
Chestnut Roan Ink
Le Pen Black Pen
Yellow Sheer Ribbon
Pop Dots
Antique White Paper
Paint Brush
Gemstones

Wednesday, November 20, 2013

Autumn Card with CSW Distributors

Hi it is Pam today sharing with you my Autumn Card using the Exotic Embossing Folder from the Fine Designs Collection. I love all the beautiful swirls that showed up once I used my Sanding Block to expose the core center of my distress paper.
I placed the burnt orange embossed paper on to brunt orange and brown card stock and then layered my sentiment to the top with some pretty matching paper and sentiment, adding a fun sheer ribbon and bird chippie to the front. I placed the sentiment on with some Foam Mounting Tape. Hugs Pammejo
Couture Creations Supplies:
CO723256 Exotic Embossing Folder from the Fine Designs Collection
CO723040 Circle Nesting Dies
CO721996 Crystal Self-Adhesive Gemstones
CO721986 Handheld Essentials
CO721963 Foam Mounting Tape 

CO721984 Double-Sided Tape
CO723060 - Sanding Block
CO723039 Precision Trimmer
CO721957 Cutting Mat

Sunday, November 17, 2013

Gather a Harvest of Love with SinCiy Stamps

 Hi it is Pam today sharing with you this fun 8 x 8 "Gather a Harvest of Love" Frame...if you love to watercolor, you will love this frame but first begin by placing a piece of fall pattern paper inside the frame and on the sides using the same pattern paper.
 To make all the beautiful leaves, you will need your SinCity Fall Collection 2 Stamps from Pam Bray, Black Memories Ink, distress paint (listed below), mister bottle full of water, paint brush and watercolor paper. Stamp 18 leaves on to watercolor paper with your black ink....
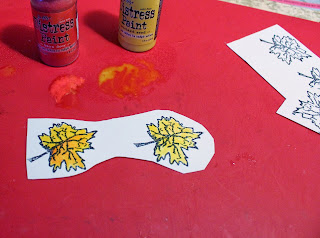
Dab Mustard Seed and Barn Door Distress Paint on to your work surface, mist with water to thin it out....I also mist a puddle of water so I can dip my paintbrush into it as I am working....paint your leaves with Mustard Seed and then add the Barn Door to give the leaves dimension, it helps to even pick up a bit of each paint along with the water.....
 Do the same with next set, only use Barn Door, Fired Brick and Frayed Burlap.....
 and the last set with Wild Honey, Mowed Lawn, Seedless Preserves,
 Fussy cut them all out....
Punch out a 3 1/2" circle and stamp "Gather a harvest of Love" from the SinCity Stamp Fall Collection 2 Stamp Set and place it in the center of the frame. 
Add all but three of the leaves you have painted around the circle, place a bow at the edge of the circle.
Place some dried fall pieces to the bottom of the frame along with the last 3 leaves to make them appear to be falling. I hope you enjoy my "Gather a Harvest of Love" Frame and try to make one for the Thanksgiving holiday. Hugs Pammejo
Supplies:
SinCity Stamps Fall Collection 2 by Pam Bray
8 x 8 7Gypsies Frame
Tim Holtz Distress Paints: Mustard Seed, Rusty Hinge, Mowed Lawn, Seedless Preserves, Wild Honey, Barn Door, Fired Brick, Frayed Burlap
Black Memories Ink
Sheer Brown Ribbon

Thursday, November 7, 2013

Happy Haunting with CSW Distributors

 Hi!!! Happy to see you stop by the blog today and I am going to be sharing a bit of Halloween inspiration....I am sure by now you have gotten a few of your favorite Halloween photos published and would like to do up a few layouts. So I would love to show you how I used the Sophia Collection to add some fabulous depth to my layout.
 I used the Connexion (CO723506) Sophia Die at the top of my layout with the Stella (CO723483) Sophia Die....I added a few roly poly flowers and placed a gemstone in the center of each of the flowers.
 I did the same at the bottom of my layout using just the Stella (CO723483) Sophia Die, again adding a few of the roly poly flowers. I just love making them because they are so easy, just use on of the Circle Nesting Dies (CO723040), using your scissors make a spiral with each circle you have cut...(I used the 2" inch die for mine), roll with your tweezers from your Handheld Essentials ( CO721986) and glue once you have them rolled up.
I made a few flags and added them to my page, placed a few of the sticker on each flag with Foam Mounting Tape ( CO721963) after
I fussy cut out two of the little girls sitting on the pumpkin, a few of the postage stamps and layered them together with the Foam Mounting Tape. (CO721963). I hope you have enjoy my layout and try the Sophia Collection on your projects and would love for you stop by the CSW Distributors Blog and see  what the designers have been sharing.  Hugs Pammejo
Couture Creations Supplies:
Connexion (CO723506) Sophia Die
Stella (CO723483) Sophia Die
Circle Nesting Dies (CO723040)
Handheld Essentials ( CO721986)
Foam Mounting Tape (CO721963)

Sunday, November 3, 2013

Autumn Wall Hanger with SinCity Stamps Fall Collection 1 and 2

Hi, I am sharing my Autumn Wall Hanger today on the SinCity Stamps Blog using my SinCity Stamps Fall Collection and Fall Collection 2 Stamp Sets. 
 I began my project by cutting a piece of card board to measure 5" x 7" and covering it with Chocolate Burlap.
I cut a piece of Autumn Splendor paper, stamped Autumn on a piece of it with my Artprint Brown ink, distress the edges with the Tim Holtz distress tool to make all the edges look worn and inked it afterwards with Gathered Twigs and Wild Honey Distress ink.
Stamp the twigs and filigree on the top of the paper with Artprint Brown ink and adhere into place....add Tim Holtz metal corners over the burlap covered cardboard.
I stamped several leaves on three pieces of the Autumn Splendor papers and fussy cut them out.
Place the Autumn sentiment on to the top with pop dots, layer the leaves and artificial leaves and flowers to the top of the piece with glue dots and pop dots. 
Spray at piece of bright orange sheer ribbon with Dylusions Melted Chocolate and make a bow when it is dry.
 I stamped four small dragonflies with the Crimson ink and fussy cut them out....
 Add some Glimmer Glaze on the wings so they stay stiff when they are dry....
Place the dragonflies and bow on the Autumn Wall Hanging when the wire hanger has been attached. I hope you are inspired to make yourself a Autumn Wall Hanger as I was when I seen something similiar in a book at my local craft store. Make sure to check out all the fabulous stamps at the SinCity Stamp Store and check out the SinCity Stamps Blog. Hugs Pammejo-http://pammejo-scrapbookflair.blogspot.com/
Supplies:
SinCity Stamps Fall Collection
SinCity Stamps Fall Collection 2
WeR Memory Keepers Autumn Splendor
Canvas Corp Chocolate Burlap
Tim Holtz Gathered Twigs and Wild Honey Distress Ink
Tim Holtz Distress Tool
Tim Holtz Tiny Attacher
Chipboard
Memories Crimson and Artprint Brown Ink
Versafine Black Ink
Dylusions  Melted Chocolate
Glimmer Glaze Fine Glitter
MonAmi Gabby Bling
Prima Lantern
Glossy Accent
Orange Sheer Ribbon
Artificial Flower Stem
Wire Hanger