Friday, August 18, 2017

Baby's First Passport Mini Album with Authentique

Disclaimer Notice: I’ve received products/compensation as part of the Authentique  Design Team. This project however, is 100% my own project! Some of the links in this post are affiliate links. I explain more HERE!.


 Today I am sharing my Baby's First Passport Album.
There is nothing sweeter than seeing babies doing their firsts...seeing their fingers and toes, eating their first bite, seeing their first smile, etc. My Baby's First Passport Mini is a wonderful way to capture photos and journal entries of each "sweet" moment.


Begin by first die cutting Passport Album from chipboard and pattern paper.
Cover the chipboard pieces with the prepared pattern paper from the Beginnings Collection.
Add mats and borders to each page as you go along. (Refer to photos)


Inside Cover and 1st Page


Fussy cut image from pattern paper; add to top of mat pocket with pop dots.


Place tags behind hidden pocket mat.


Page 2 and 3


Page 4 and 5


Fussy cut sentiment from pattern paper; add to front of page with pop dots.


Add stickers to some of the pages.


Page 6 and 7


Fussy cut some of the diamond prints from the pattern paper; adhere to border strip along with scallop borders.


Page 8 and 9


Add mats, pockets and tags to add a few more memories to.


Add small scallop borders to bottom of tags to give added details.


 Place the same size of stickers on both sides of prepared tags works as a pull to remove tag from pocket.


Page 10 and 11


Frame image from the Beginnings pattern paper; fussy cut second image and add to front of prepared frame with pop dots. Add to front of mini album.


 Add flowers to front of mini album.


 Add sticker from Beginnings Sticker Sheet to planner clip; add to front of mini album.


Tie all the prepared pages to inside of Baby's First Passport Album with ribbon; tie in to a pretty bow.


I hope I have inspired you to grab your Authentique Beginnings Collection Kit and create a "first" mini album to use to place some of your precious memories into. Hugs Pam

Supplies:

Thursday, August 17, 2017

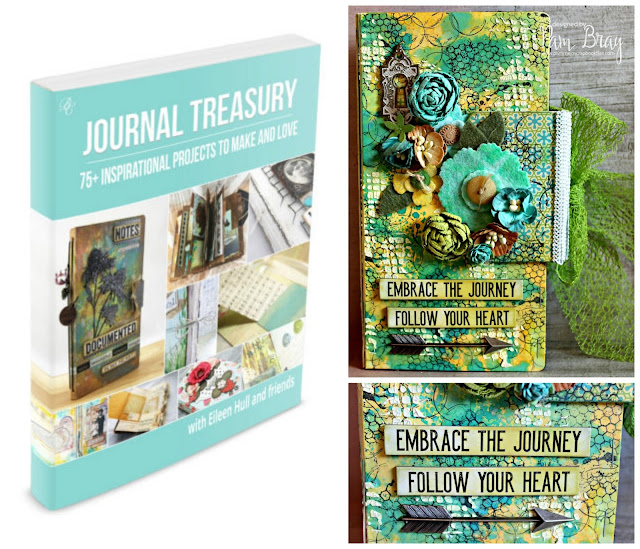
Journal Treasury EBook with Eileen Hull and Friends


http://bellacraftspublishing.com/journal-treasury-eileen-hull?ap_id=PamB#


Did you see Eileen Hull Designs Journal Treasury eBook?
It's filled with wonderful and inspiring projects using Eileen's Journal die along with other Sizzix dies.
I feel so blessed to be apart of such a beautiful publication and in the midst of such talented designers in the industry.
Make sure you get yours soon at the introductory price!!!
HERE!!!

Wednesday, August 16, 2017

Just A Note Card with Xyron and Xyron Magnetic Adhesive

Disclaimer Notice: I’ve received products/compensation as part of the  Xyron Design Team. This project however, is 100% my own project! Some of the links in this post are affiliate links. I explain more here.


Hi Everyone!!! I am so glad you stopped by today to see what I am up too!
This week the Xyron Design Team is sharing Back To School projects!!!
How fun is that!!!!
I created a "Just A Note...Thanks You Rock" Card with two Refrigerator Magnetics inside to give to a favorite teacher but it would also just be a great card to give to anyone.


Begin by first adhering pattern paper to top of card using the Xyron Tape Runner.


Create a small flag from the pattern paper; adhere to top of ABC Journal piece with Xyron Tape Runner.


Stamp sentiment to front of card with black ink; add prepared journal piece to top of card with pop dots.


Punch flowers from pattern paper; layer together. Add small white enamel dot.
Add to front of journal piece.


Add bow to top of card.


Tuck chipboard piece in under twine bow.


Add a few more prepared flowers to top of card.


Add small chipboard to corner of card.


Cut pattern paper strips to form pocket to inside of card.
Add staples to top of pocket.
Stamp sentiment with black ink to inside of card.


Adhere two of the ABC journal pieces to black card stock.


Trim away magnetic waste from around the journal pieces.


Closer Look!!!


Place on Refrigerator...to make sure they stay before you place them in the card.


Add to magnetic journal pieces to inside pocket.


Add sticker to top of inside of card with pop dots.


I hope you are inspired to grab your favorite Xyron products and create something special to give as a gift.
ALSO...
stop by and check out my talent Xyron team mates Nicole and Anita to see what she has created today.

Supplies:
Graphic 45 ABC Primer Collection and Chipboard
MayArts Ribbon: Red Twine
White Enamel Dots
Flower Daisy Punch
Black Ink
Black Card Stock

Follow Xyron

Tuesday, August 15, 2017

Razzle Dazzle House Note Pad Holder with Eileen Inspiration Team

Disclaimer Notice: I’ve received products/compensation as part of the Eileen Hull Inspiration Team. This project however, is 100% my own project! Some of the links in this post are affiliate links. I explain more HERE!.


Good Morning everyone!
I hope you have been enjoying the last few months as Eileen Hull's Inspiration Team is sharing "unique" projects using her dies.
Over the next few weeks Sizzix have a Maker Challenge they are showcasing Eileen Hull's House Pocket Die.
Pop by Eileen's Blog
HERE for all the details.


I created a Razzle Dazzle House Note Pad Holder using the House Pocket Die, Make It 3-D Die, Birds and Butterflies Die and  Stitchy Flower & Leaf Thinlits to create my "unique" piece!


Begin by cutting 2 of the House Pocket Die from thin chipboard; cut one like the photo above.


Die cut two of the Make It 3-D Die; cut in half. Adhere together to form narrow box.


Adhere pattern paper to top of formed box.


Cut pattern paper from House Pocket Die; adhere to chipboard.
Lay stencil to top of prepared chipboard; apply paste using palette knife. Dry.


Cut window and doors from pattern paper using the House Pocket Die; adhere to prepared chipboard.


Adhere prepared house to back of box.


Adhere jute to top of roof line of house.


Adhere jute around edges of box rim.


Cover second House Pocket Die using pattern paper.
Adhere to front of box.
Add small button to front of House Note Pad Holder.
Adhere small beads to bottom of holder.


Die cut Stitchy Flower & Leaf  from pattern paper.


Form flowers; layer together with metal brads.
Adhere to front of box; along with some chipboard pieces.  


I hope I have inspired you to make something "unique" using Eileen's fabulous dies from Sizzix.
REMEMBER!!!
Stop by Eileen's Blog to always be inspired by her very talented Inspirational Team as they are all sharing unique ways to use Eileen's dies!


Supplies:
®Sizzix/Eileen Hull Stitchy Flower and Leaf #661903
DCWV Razzle Dazzle 12" x 12" Paper Pad
Stampers Anonymous Speckles Stencil
DecoArt Media Crackle Past
Gypsy Soul Laser Cuts Filigree
Xyron Creative Station and Permanent Adhesive
Random Metal Brads
Palette Knife
Tweezers
Thin chipboard (like a cereal box)
Hot Glue Gun and Glue Sticks
4" Post A Notes
Jute
4 Teal Beads
http://bellacraftspublishing.com/journal-treasury-eileen-hull?ap_id=PamB#