Showing posts with label Die-Namites. Show all posts

Saturday, September 5, 2015

Craft Hoarders Anonymous Monthly Blog Hop

 
Welcome to the September Craft Hoarders Anonymous Blog Hop! You should be coming to my blog from  Debbie's Blog. 

I created a card box for my first project....
using Graphic 45 Botanical Tea Collection.
Before I get to far into my project...I have to confess that the card box has been made for months and sitting on shelf, all I did was get it down, dust it off and make my cards. Grin....I am a true hoarder at heart. 
I love to fussy cut so I cut up a lot of Graphic 45 Botanical Tea and place my dimensional pieces on the top of my card box making layers with pop dots. Added a bit of string to make it look like the small flags are flying and added a beautiful flower to the top. 
I used Stampendous "I'm Thinking of You" stamp from the Say It Today set for all of my cards. On this card I matted the journal block I stamped with several pieces of pattern paper and card stock...
Placing it on the front of my layers of Botanical Tea pattern paper, added more beautiful pre-made flowers, clear gemstones and more of the fun twine. 
 For my second card I layered blue and brown card stock to my card base prior to adding Botanical Tea pattern paper to the front. Stamp sentiment to front with black ink.
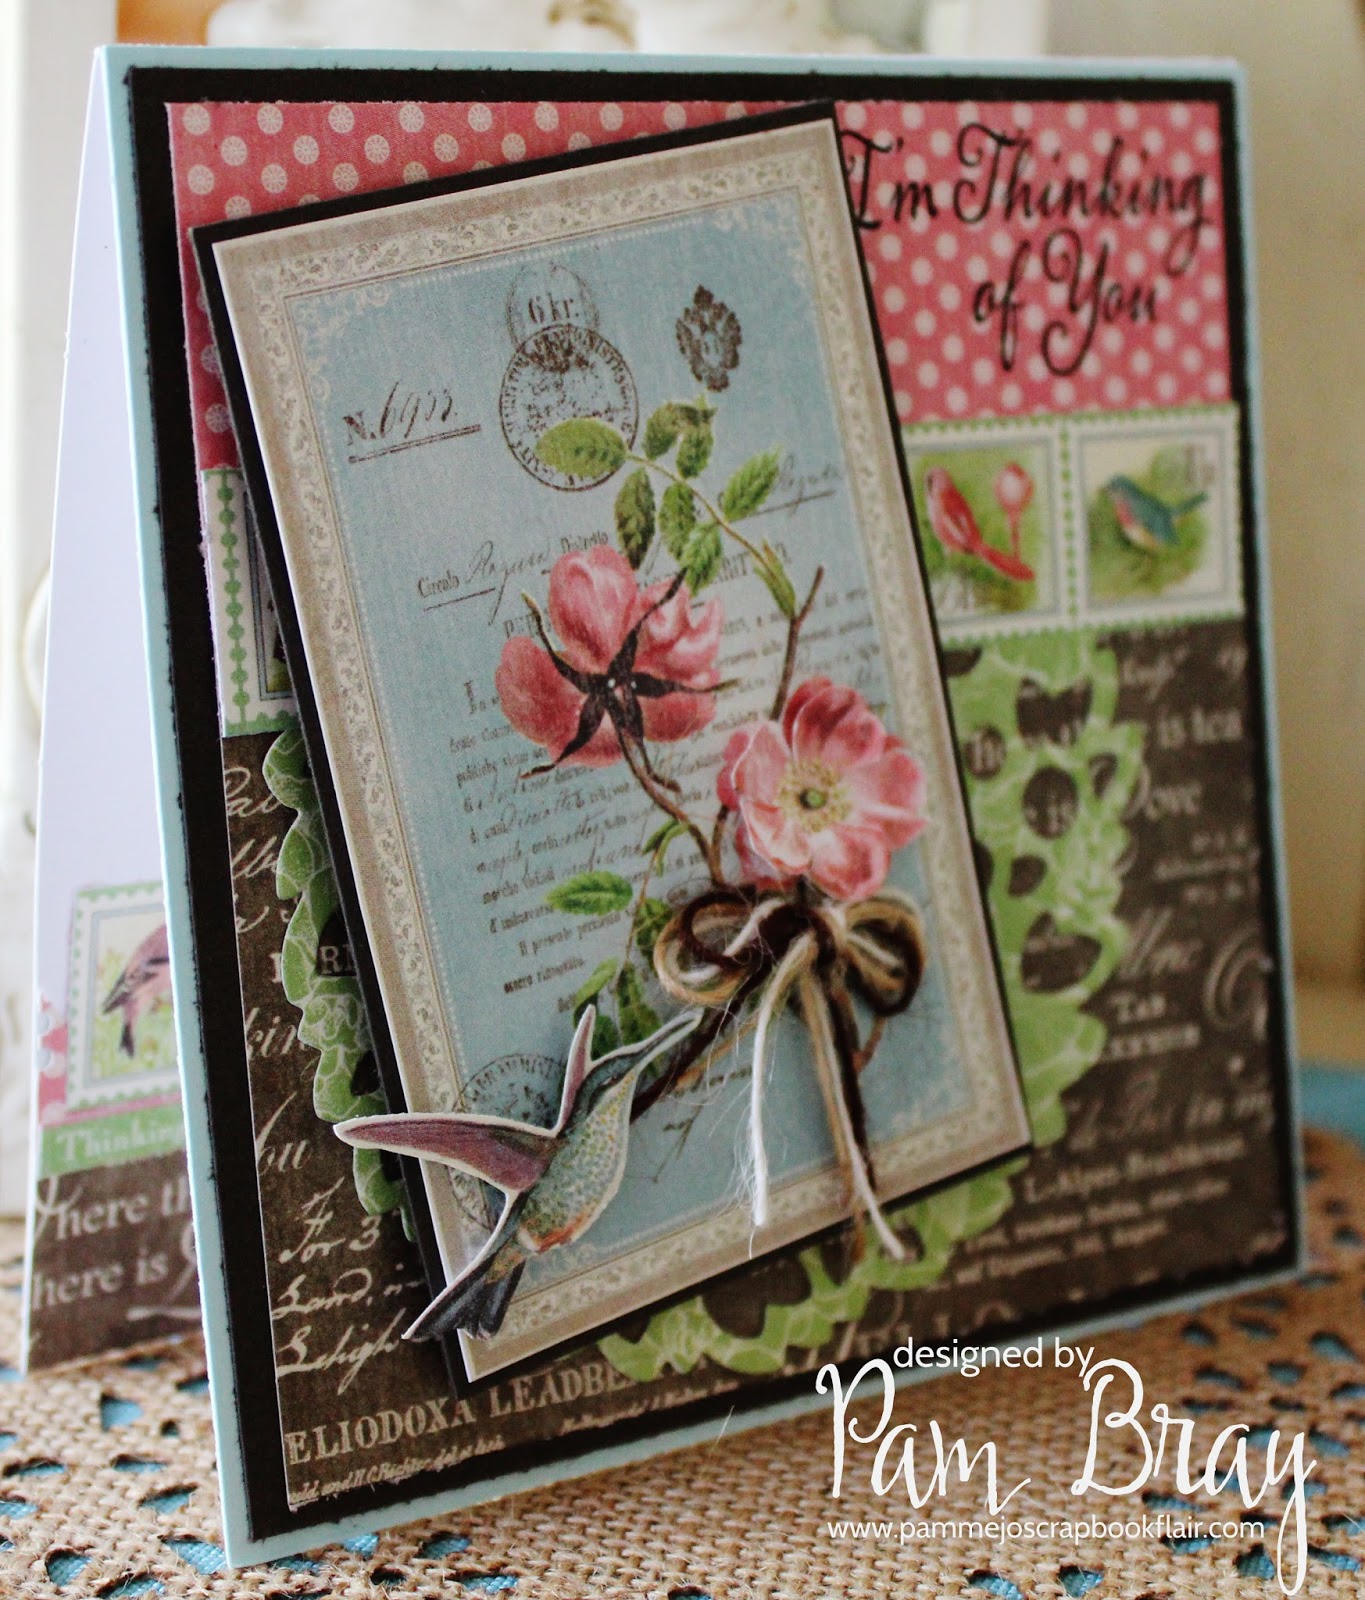
Add a DieNamites Holiday Wreath die cut to the front prior to placing the layered journal block to the front.
 My third card is using the Botanical Tea Collection, stamping the sentiment with black ink and layering journaling pieces and stamps to the top. Add a few pretty pre-made flowers and twine.
Lastly, I placed brown card stock to the card base and embossed the sentiment using white embossing powder. Add Botanical Tea pattern paper to the top, with a layered journal block. Wrap card with twine and tie in bow. Place a layered flags to the front along with fussy cut pieces to the top of card with pop dots. 
Well I hope you enjoyed my Botanical Tea Card Box with cards. 
Hope this encourages you to go through your stash of half made projects and maybe finish one or two of them up.
After visiting me, hop over to Jacquie's Blog next! If you get lost along the way head back over to Gloria's to start at the beginning of the hop, and for the full list of Bloggers, go to Gloria's Blog!

Blog Hop Order
PamBray (You're HERE!!!)

Supplies:

Monday, August 17, 2015

Thank you with Die-Namites

Hi!!! I am excited to share that I am on the Die-Namites Blog today. I am sharing with you my take on the August Sketch Challenge...I choose #3 from the sketches that is shared on the challenge photo.
This month you will have the opportunity to choose one of these four Die-Namites  sketches to create your project. You can make a card or  layout. And guess what? The Dare is Anything Goes!!!

Here are the rules to play along!
********************************************************************* 
TO ENTER the Die~Namites Dies May Sketch Challenge YOU MUST:
1.Use at least one Die~Namites Die in your creation. 
2.Use one of these SKETCHES! It can be interpreted (loosely or exactly) as a card, layout, or altered piece! 
3. Incorporate the DARE into your creation. 
4. Mention the Die~Namites Die you used in your blog post. 
5. Link back to the Die~Namites Die. 
6. You have until August 30 to post your creation on your blog and link up to this post.  **PLEASE add a link to your direct post, not your entire blog.**
Each participant will receive one entry into our random drawing
for each entry into the challenge.
 A random winner will be chosen from eligible participants for a
$25 Gift Certificate to Die~Namites Dies.
********************************************************************* 
I began by first layering my pattern paper and border onto black card stock that was placed on a 5" x 6,1/2" card base. I cut two darker and one lighter Heart Leaves Swirl DN-1194 from pattern paper and one Elegant Medallion DN-1092 from pattern paper.


I love Xyron Creative Station...you can run both 9" and 5" adhesive.
The Xyron Creative Station allows you to run a lot of large pieces or small intricate ones like the Die-Namite die cuts that are so detailed.
Remove the intricate Heart Leaves Swirl DN-1194 from the adhesive sheet and place them on the front of the prepared card base. (Leave the Elegant Medallion DN-1092 on the Xyron adhesive sheet til you need it.)
Add double mat to over the top of the Heart Leaves Swirl DN-1194.
Take the Elegant Medallion DN-1092 off the adhesive sheet and place the matted piece.
Add a sentiment and a couple of layer embellishment from the sticker sheet. 
I hope you enjoyed my take on the Die-Namites August Sketch Challenge #3. Hope you play along with us this month and link your entry to the blog.  
We would love to have you as friend, follower and subscriber to the Die-Namites following these social media avenues: Facebook  Fans, Pinterest and Instagram.
 Hugs Pammejo
Supplies:
Elegant Medallion DN-1092
Xyron Creative Station
Carta Bella Paris Girl Paper Collection and Sticker Sheet
Pink Gemstones
Card Base
Black Card Stock
Pop Dots

Die’Namites Design Team
I'm so happy to be a Die-Namites Design Team Member and help promote their wonderful products. They so generously supply us with so many fabulous dies to work with like those that I'm using today.

Monday, August 10, 2015

Happy Birthday Card with Die-Namities

 Hi!!! I am sharing with you my Happy Birthday card that I created for the Die-Namites Blog today using...


AND


 Begin by first applying adhesive to a piece of white card stock using Xyron Create Sticker MAX. Die cut  Floral Corner DN-1019 on two corners, emboss using the Craftwell Wood Grain Cottage Embossing Folder. Carefully remove adhesive backing paper from back of embossed paper. Place on card front that you have placed a pretty piece of pattern paper and border on. 

 Die cut two of the Bird Wreath DN-1003 from pattern paper. Stamp "Happy Birthday" sentiment from Stampendous Stamps on lighter pattern paper, place the darker pattern paper wreath part on top. Put on card front with pop dots.  
Add small clear gemstones to the center of the flowers and a pretty bow to the side of the
 Floral Wreath DN-1013. 
Also don't forget to add a pretty matted border to the inside of your card using


Die’Namites Design Team
I'm so happy to be a Die-Namites Design Team Member and help promote their wonderful products. They so generously supply us with so many fabulous dies to work with like those that I'm using today.

Thursday, July 23, 2015

Mixed Media Canvas with DieNamites and Ken Oliver Stick It

 Hi!!! I am so excited to share my mixed media canvas today using Die-Namites Dies along with Ken Oliver's Stick It which you can find at Scrapbook.com. 
 I began by first spraying a 8" x 8" canvas with Dylusion Sprays. Allow it to dry completely. 


 Place a piece of Ken Oliver's Stick It Adhesive to a piece of Ken's Studio pattern paper. Die cut out Spring Doily (DN-1159) from the center of the paper. Place prepared pattern paper on top of black card stock. Place  Spring Doily (DN-1159) to center of black card stock.
 Apply to top and bottom of dry canvas black gesso using Woodgrain Stencil with palette knife. (Lay matted piece down to determine where to apply gesso) Allow to dry completely.
Add the matted piece to top of dry canvas using pieces of Ken Oliver's Stick It.
 Spray black burlap ribbon and rosette ribbon with Vibrant Turquoise Dylusion Spray, dry completely and place on canvas.

 Place Ken Oliver's Stick It to a piece of Ken's Studio pattern paper, die cut Bird Song (DN-1058), Place around the Spring Doily (DN-1159) Add an image to center of the
 
Die cut two of the Flowering Branch (DN-1044) from green card stock and place with flowers to the front of the canvas. Fussy cut two of the flowers from Ken Oliver's Studio pattern paper and add to front to canvas. I hope you enjoyed my mixed media canvas today, make sure to check out our week long Ken Oliver inspiration pieces along with taking a peek at both Die-Namites Store, Blog and Ken Oliver's Products.
Supplies:
 Ken Oliver Stick It
Ken Oliver Studio Paper Collection
Dylusions Sprays: Vibrant Turquoise, Lemon Zest, Black Marble
DecoArtInc Black Gesso
Tim Holtz Woodgrain Stencil
Palette Knife
Burlap and Black Ribbon
Rosette Ribbon
 Random Flowers
Green Card Stock
8" x 8" Canvas
I'm so happy to be a Die-Namites Design Team Member and help promote their wonderful products. They so generously supply us with so many fabulous dies to work with like those that I'm using today.

Saturday, July 18, 2015

Friends Paper Weight with Die-Namites

 Did you know we had a Friends Day this month...that was a new one for me but I thought okay I will create something special for a friend of mine. NOW...who will I give it to, lol.
I began my project by die cutting two to of the Regal Heart DN-1119 using a piece of pattern paper.
 I love my Xyron Creative Sticker MAX, it works perfect for all of the Die-Namite Dies. I ran the two Regal Hearts through it.
Cut one Party Banner DN-1277 on  pink paper and then repeat using five different pattern paper.
 Run the pattern banners from the  Party Banner DN-1277 through the Xyron Sticker Maker and place on to the pink Party Banner DN-1277.
 Layer the prepared pattern papers together. Place Regal Heart Die DN-1119
on to green paper and fussy cut around them. 
Add Regal Heart DN-1119 to back of layered pattern pieces so that the hearts form a scallop.
 Add Party Banner DN-1277 to bottom of layered pattern paper, add twine bows. 
 Paint and add "Friends" and "Bird" Chipboard to top of layered pattern paper. Place on a paper weight. I hope you enjoyed my "Friends Paper Weight" project today and remember to  stop by the Die-Namites Blog and Store to check it out, don't forget to play along with us on the July  Die-Namites Sketch Challenge...details HERE!!!
Supplies:
Authentique Pattern Papers
Marion Smith Ephemera
Prima Pattern Paper
Deco Corner Chomper
Pink Twine
I'm so happy to be a De-NamitesDesign Team Member and help promote their wonderful products. They so generously supply us with so many fabulous dies to work with like those that I'm using today.