Saturday, May 7, 2022

Bloom Mixed Media Art Journal Pages


Hello!!!
Happy Saturday!!!
 Do you love art journaling, well I do!!!
I recently bought an Arteza Watercolor Sketch Book on the recommendation of my creative friend Christine - The Mad Inker! 
I so love the size of the 5.3 x 8.1 sketchbook! 


I began by spraying two pages with Ranger Distress Oxide Sprays. 


Once dry stamp the two pages randomly using Stampers Anonymous Faded Types using black ink. 


Stamp Blank Page Muse Dragonfly and Chicken Wire Mesh Stamp using blank ink on both pages. 


Lay Emerald Creek Crafts WorkBench Stencil on page; apply Ranger Distress Opaque Paste. Dry


Stamp flowers, heartbeat image and sentiments from Wild Whisper Bloom in Love Stamp Set with black ink. 


Using Ranger Distress Ink Refills along with mist of watercolor images in with paintbrush. 


Stamp sentiments using Peeled Paint Ranger Archival Inks. 


Stamp leaf ring with Peeled Paint Archival Ink. 


Apply Ranger Distress Statue Foundry Wax to top of dry paste; heat set. 


I hope you are inspired to grab an Arteza Watercolor Sketch Book and let your creative juices flow! 
Enjoy Pam

Supplies:
(All supplies are affiliated linked for your connivence!) 

Wednesday, May 4, 2022

Springtime Mixed Media Egg with Eileen Hull Inspiration Team


Happy May to all things Eileen Hull Designs!!!
Don't you love May. Flowers are blooming, birds are singing, and everything is coming into color!
I hope you are ready for a fun filled month with Eileen Hull Inspirational and Education Team projects!
Theme this month is Birds, Eggs, Nest, etc. 
I know I am looking for to the inspiration 
BUT... 
FIRST...
let me share with you my 
SPRINGTIME MIXED MEDIA EGG!


First prepare the hand that the Paper Mache egg will be placed in! 

Photo 1: Paint stand with Americana Weathered Wood; dry. Apply Peacock Feather Paint; Dry. 
Photo 2: Apply DecoArt Antiquing Creams to top of prepared stand; Dry. Remove some of the antiquing cream from stand with wet one; dry. Add some Textured Sanding Paste here and there; dry.
Set to one side.  


Photo 3: Cut Shurtape to fit in #665915 Floral Mandala Embossing Folder; emboss. 
Photo 4: Add embossed pieces to top of Paper Mache egg. 


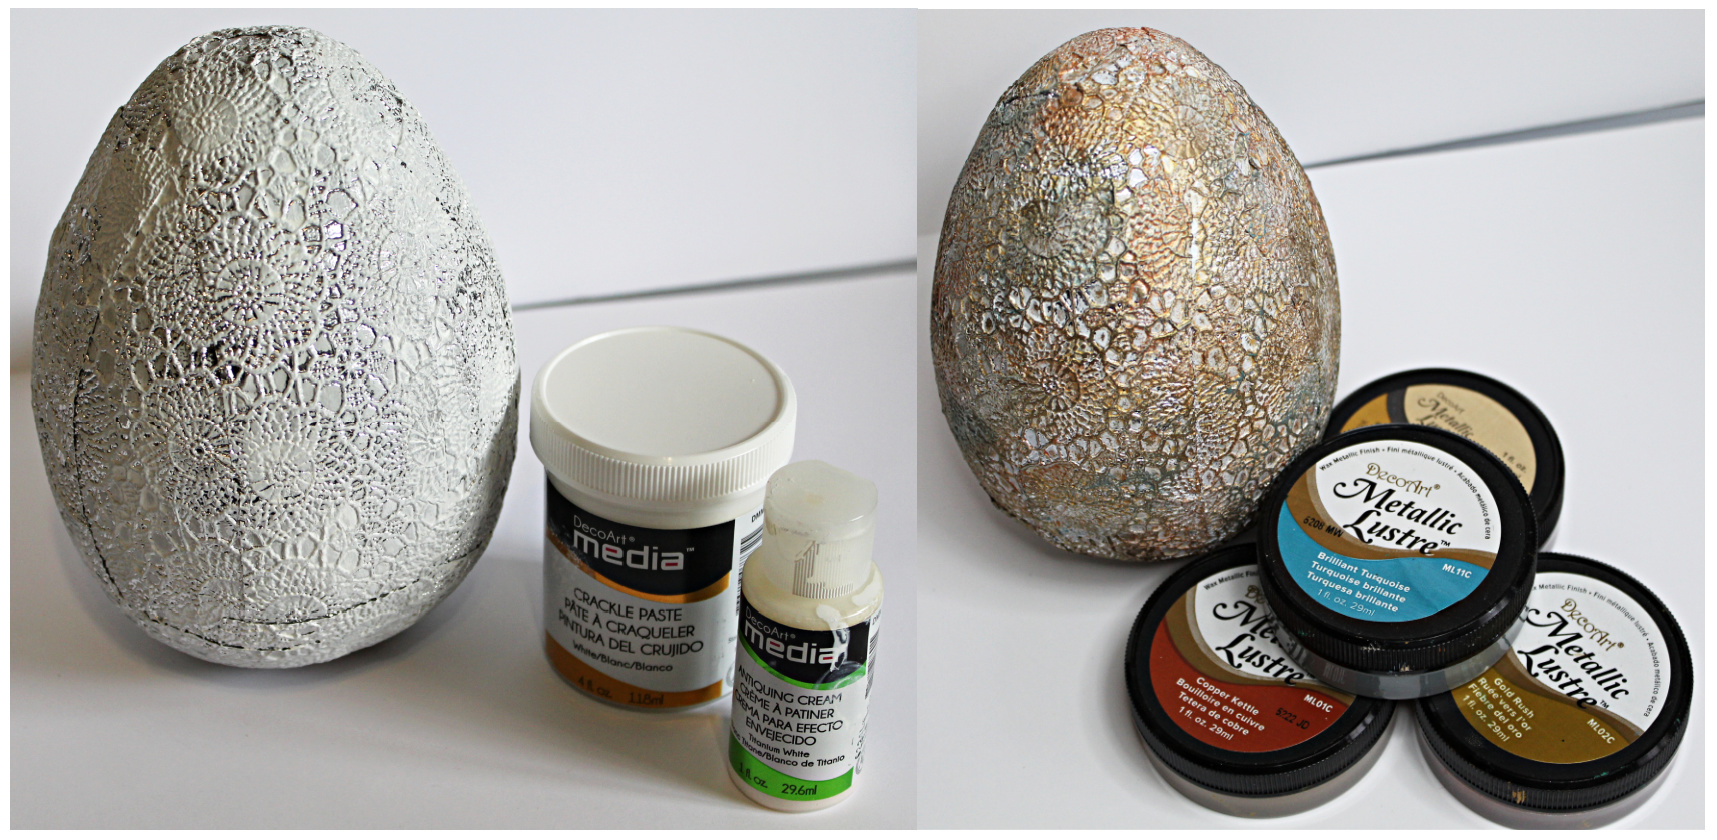
Photo 5: Apply Crackle Paste; dry. Add a bit of Antiquing Cream to top and dry. 
Photo 6: Apply Metallic Lustre to top of embossed Paper Mache Egg until you get the color shade you like on your embossed egg. 


Photo 7: Adhere prepared egg to stand. 
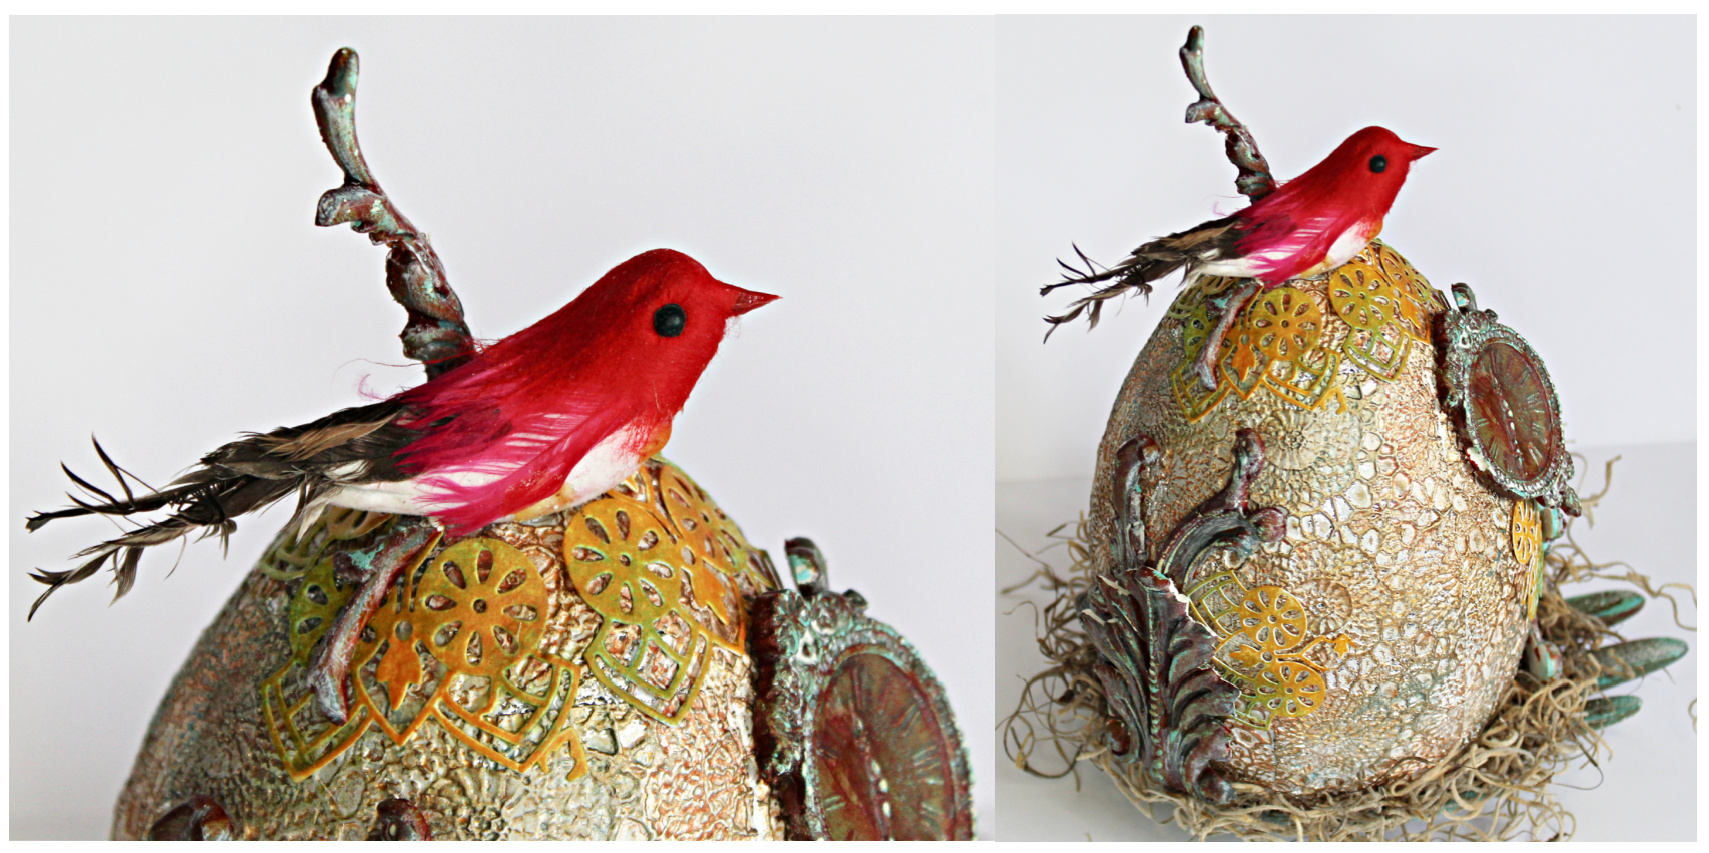
Photo 8: Adhere moss and bird to project.


Photo 9: Die cut #664882 Mandala Die from white card stock; apply distress ink to top with blending tool. Cut into pieces; adhere under bird and around resin pieces. 
Photo 10: Create resin pieces using IZOD Moulds and Paperclay; antique using antiquing cream from DecoArt. Remove bits of the antiquing cream when dry with Wet One. Add resin pieces to prepared egg. 


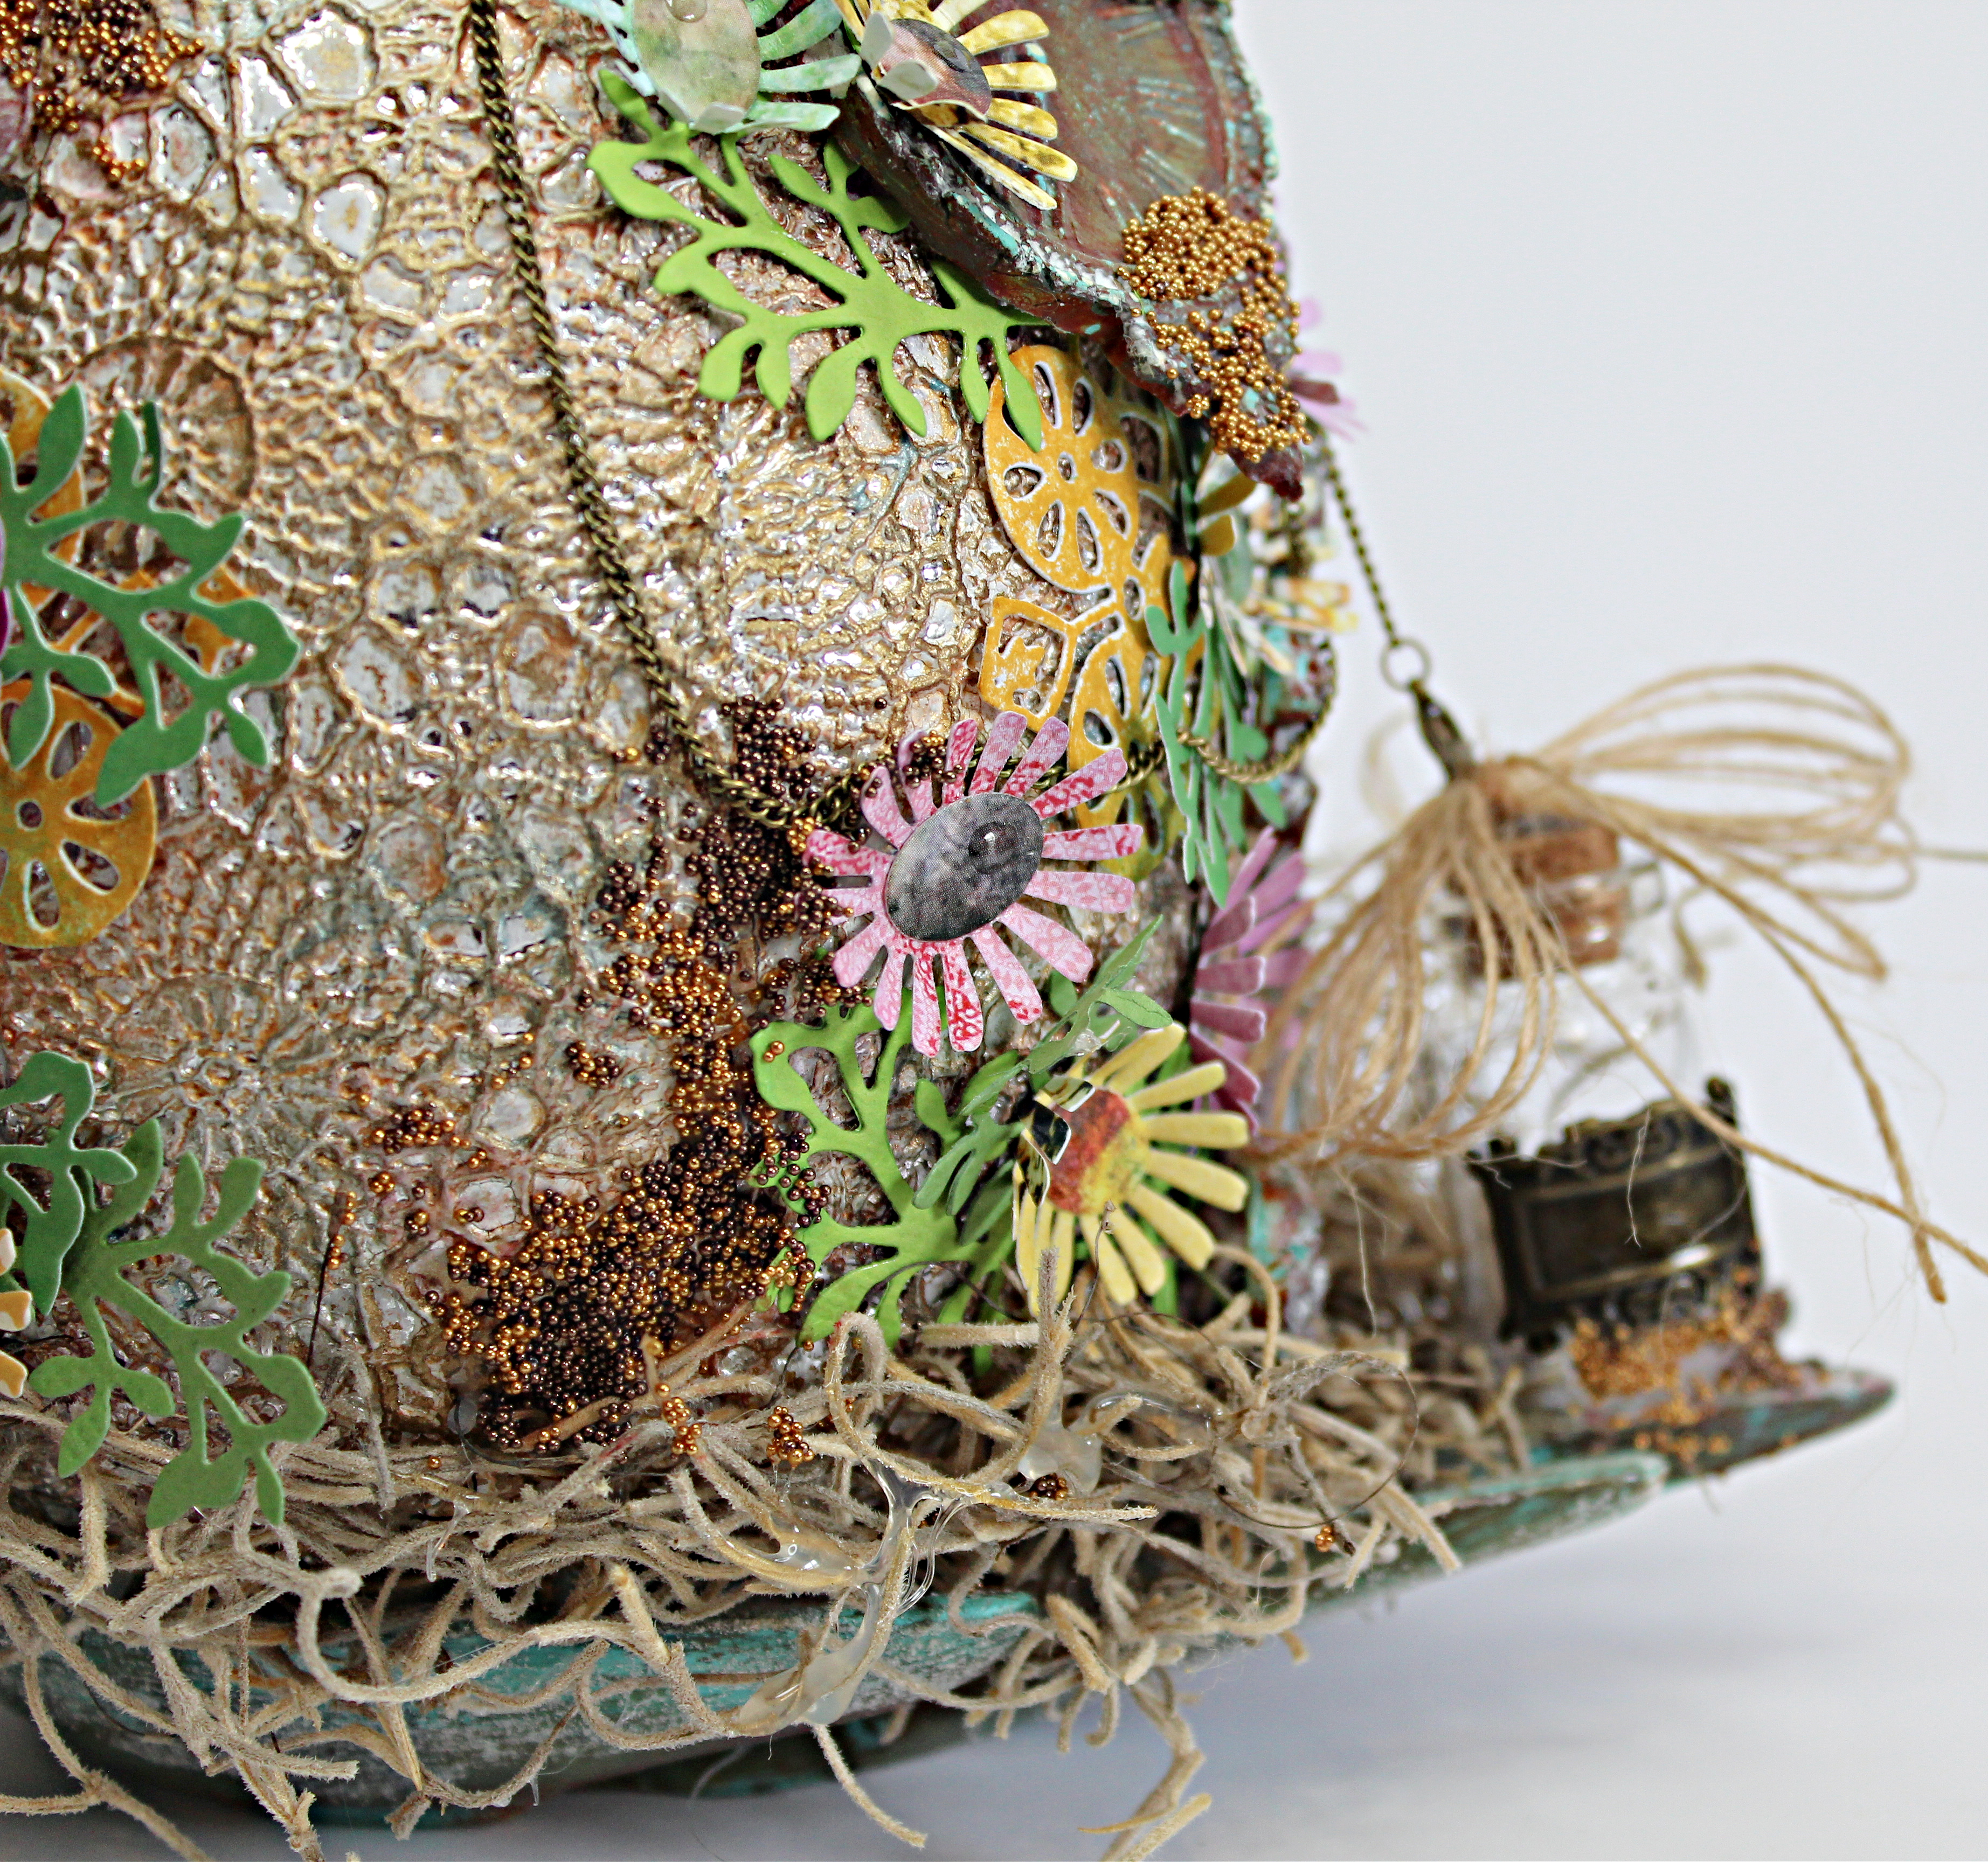
Die cut flowers and leaves from #665938 ShadowBox #1 Die; adhere randomly around egg. 


Add small jar to stand along with twine bow. 


Add gold mica beads randomly around stand and on prepared egg. 


Drape chain from bird's beak and attach to bottle. 


I hope you are inspired to head to your local hardware store for some Shurtape to use with all of Eileen's Hull's Dies and Embossing Folders!
Enjoy Pam

Supplies:
Large Paper Mache Egg
Hand Stand from Hobby Lobby or something similar
Small Glass Jar with Chain
Gold Mica Beads
Small Bird
IZOD Moulds and PaperClay
Moss
Natural Twine
Glossy Accent
Blending Tool
Shurtape from Hardware Store
Wet Ones

Make sure to stop by Eileen Hull's Blog to check out all the fabulous projects created all month long by the teams!
ALSO...
WON'T YOU COME JOIN US!!!
Lots of eye candy, fabulous tutorial, etc.
Best of all you don't want to miss Eileen's Live Shows!
Always so much fun!

I know you will truly be inspired! 
Enjoy Pam


DISCLAIMERS
This blog is compensated to provide opinion on products, services, websites, and various other topics. Even though the owner(s) of this blog receives compensation for our posts or advertisements. I always give my honest opinions, findings, beliefs, or experiences on those topics or products. The views and opinions expressed on this blog are purely my own. Any product claim, statistic, quote or other representation about a product or service should be verified with each manufacturer, provider, or party in question/This blog contains affiliate links, clicking and shopping through these links helps to support and run Pam Bray Designs - Scrapbook Flair Blog at no additional cost to you. Today's features are Eileen Hull Designs Products with Sizzix 


Monday, May 2, 2022

Write Your Own Story Mix Media Card


Happy Monday!
How about doing a bit of mix media along with bits of pattern paper and 
what better card to send to someone you love and admire but a reminder for them
 "To Write Their Own Story"!


Begin by laying stencil on white card stock; apply paste over stencil. Dry. 
Shake a bit of Lindy's Magical Shaker on prepared base. 
Spray with a water and allow to dry. 
Adhere to card stock and place on card base. 


Adhere border strip and scalloped border to card front. 


Adhere arrow to top of card along with small brad. 


Add floral Ephemera to font of card with pop dots. 


Add sentiment Ephemera to front of card with pop dot. 


Finish with stapling a few times at the bottom of the border strips. 
Enjoy Pam

Supplies
DecoArt Mixed Media Crackle Paste
Lindy's Gang Magical Shakers
Scallop Border Punch
Small Brad
5 x 6 1/2 Card Base 
Tiny Attacher 
Pop Dots
Xyron Mega Runner with Permanent Adhesive
White and Purple Card Stock
Water Mister
 

Tuesday, April 26, 2022

Making Plans Art Journal Page with Eileen Hull Inspiration Team


Making Plans!
WELL... 
Eileen Hull and Makers Forte have you covered with the newest Making Plans Stamp Set.
There is a vintage typeset list of days of the week, months, words associated with planning, organizing 
Perfect for all your art journals and other fun projects! 
Along with that there are eight label shapes that the words will fit in. 
The Making Plans Stamp Set is wonderful for all your planner, diary, calendar, date book or just to create list with! 
I created a Making Plans Art Journal Page to show how easy they are to add to your journals. 


Begin by sprinkle Lindy's Magical Shaker colors lightly on art journal page; mist with lightly with water until you get the colors you like. 
Dry thoroughly. 


Lay Honeycomb Stencil on prepared sprayed page; apply Distress Translucent Crackle Paste. 
Remove Stencil and dry completely. 
Lay stencil over dried crackle and apply distress ink to top. 
.

Stamp labels, tabs, words, numbers, etc  from Making Plans Stamp Set, and Snail Mail Postage Stamp Set using black ink. 


Continue stamping on page with Stamp labels, tabs, words, numbers, etc  from Making Plans Stamp Set, and Snail Mail Postage Stamp Set.


Stamp Wonderful World Stamp Set on prepared page with black ink. 
Color in the images with Lindy's Magical Shaker colors that have been water down. 


Finish Making Plans Art Journal Page by adding a few rub-ons here and there. 
Enjoy Pam

Supplies:
Ranger Barn Red Distress Ink
Ranger Distress Translucent Crackle Paste
Ranger Glossy Accent
Ranger Jet Black Archival Ink
Stampers Anonymous Rubons
Wild Whisper Honeycomb Stencil - (I have a few for sale)
Stencil Palette Knife 

Make sure to stop by Eileen Hull's Blog to check out all the fabulous projects created all month long by the teams!
ALSO...
WON'T YOU COME JOIN US!!!
Lots of eye candy, fabulous tutorial, etc.
Best of all you don't want to miss Eileen's Live Shows!
Always so much fun!

I know you will truly be inspired! 


DISCLAIMERS
This blog is compensated to provide opinion on products, services, websites, and various other topics. Even though the owner(s) of this blog receives compensation for our posts or advertisements. I always give my honest opinions, findings, beliefs, or experiences on those topics or products. The views and opinions expressed on this blog are purely my own. Any product claim, statistic, quote or other representation about a product or service should be verified with each manufacturer, provider, or party in question/This blog contains affiliate links, clicking and shopping through these links helps to support and run Pam Bray Designs - Scrapbook Flair Blog at no additional cost to you. Today's features are Eileen Hull Designs Products with Makers Forte 

Wednesday, April 20, 2022

Beautiful You Wall Art with Eileen Hull Inspiration Team


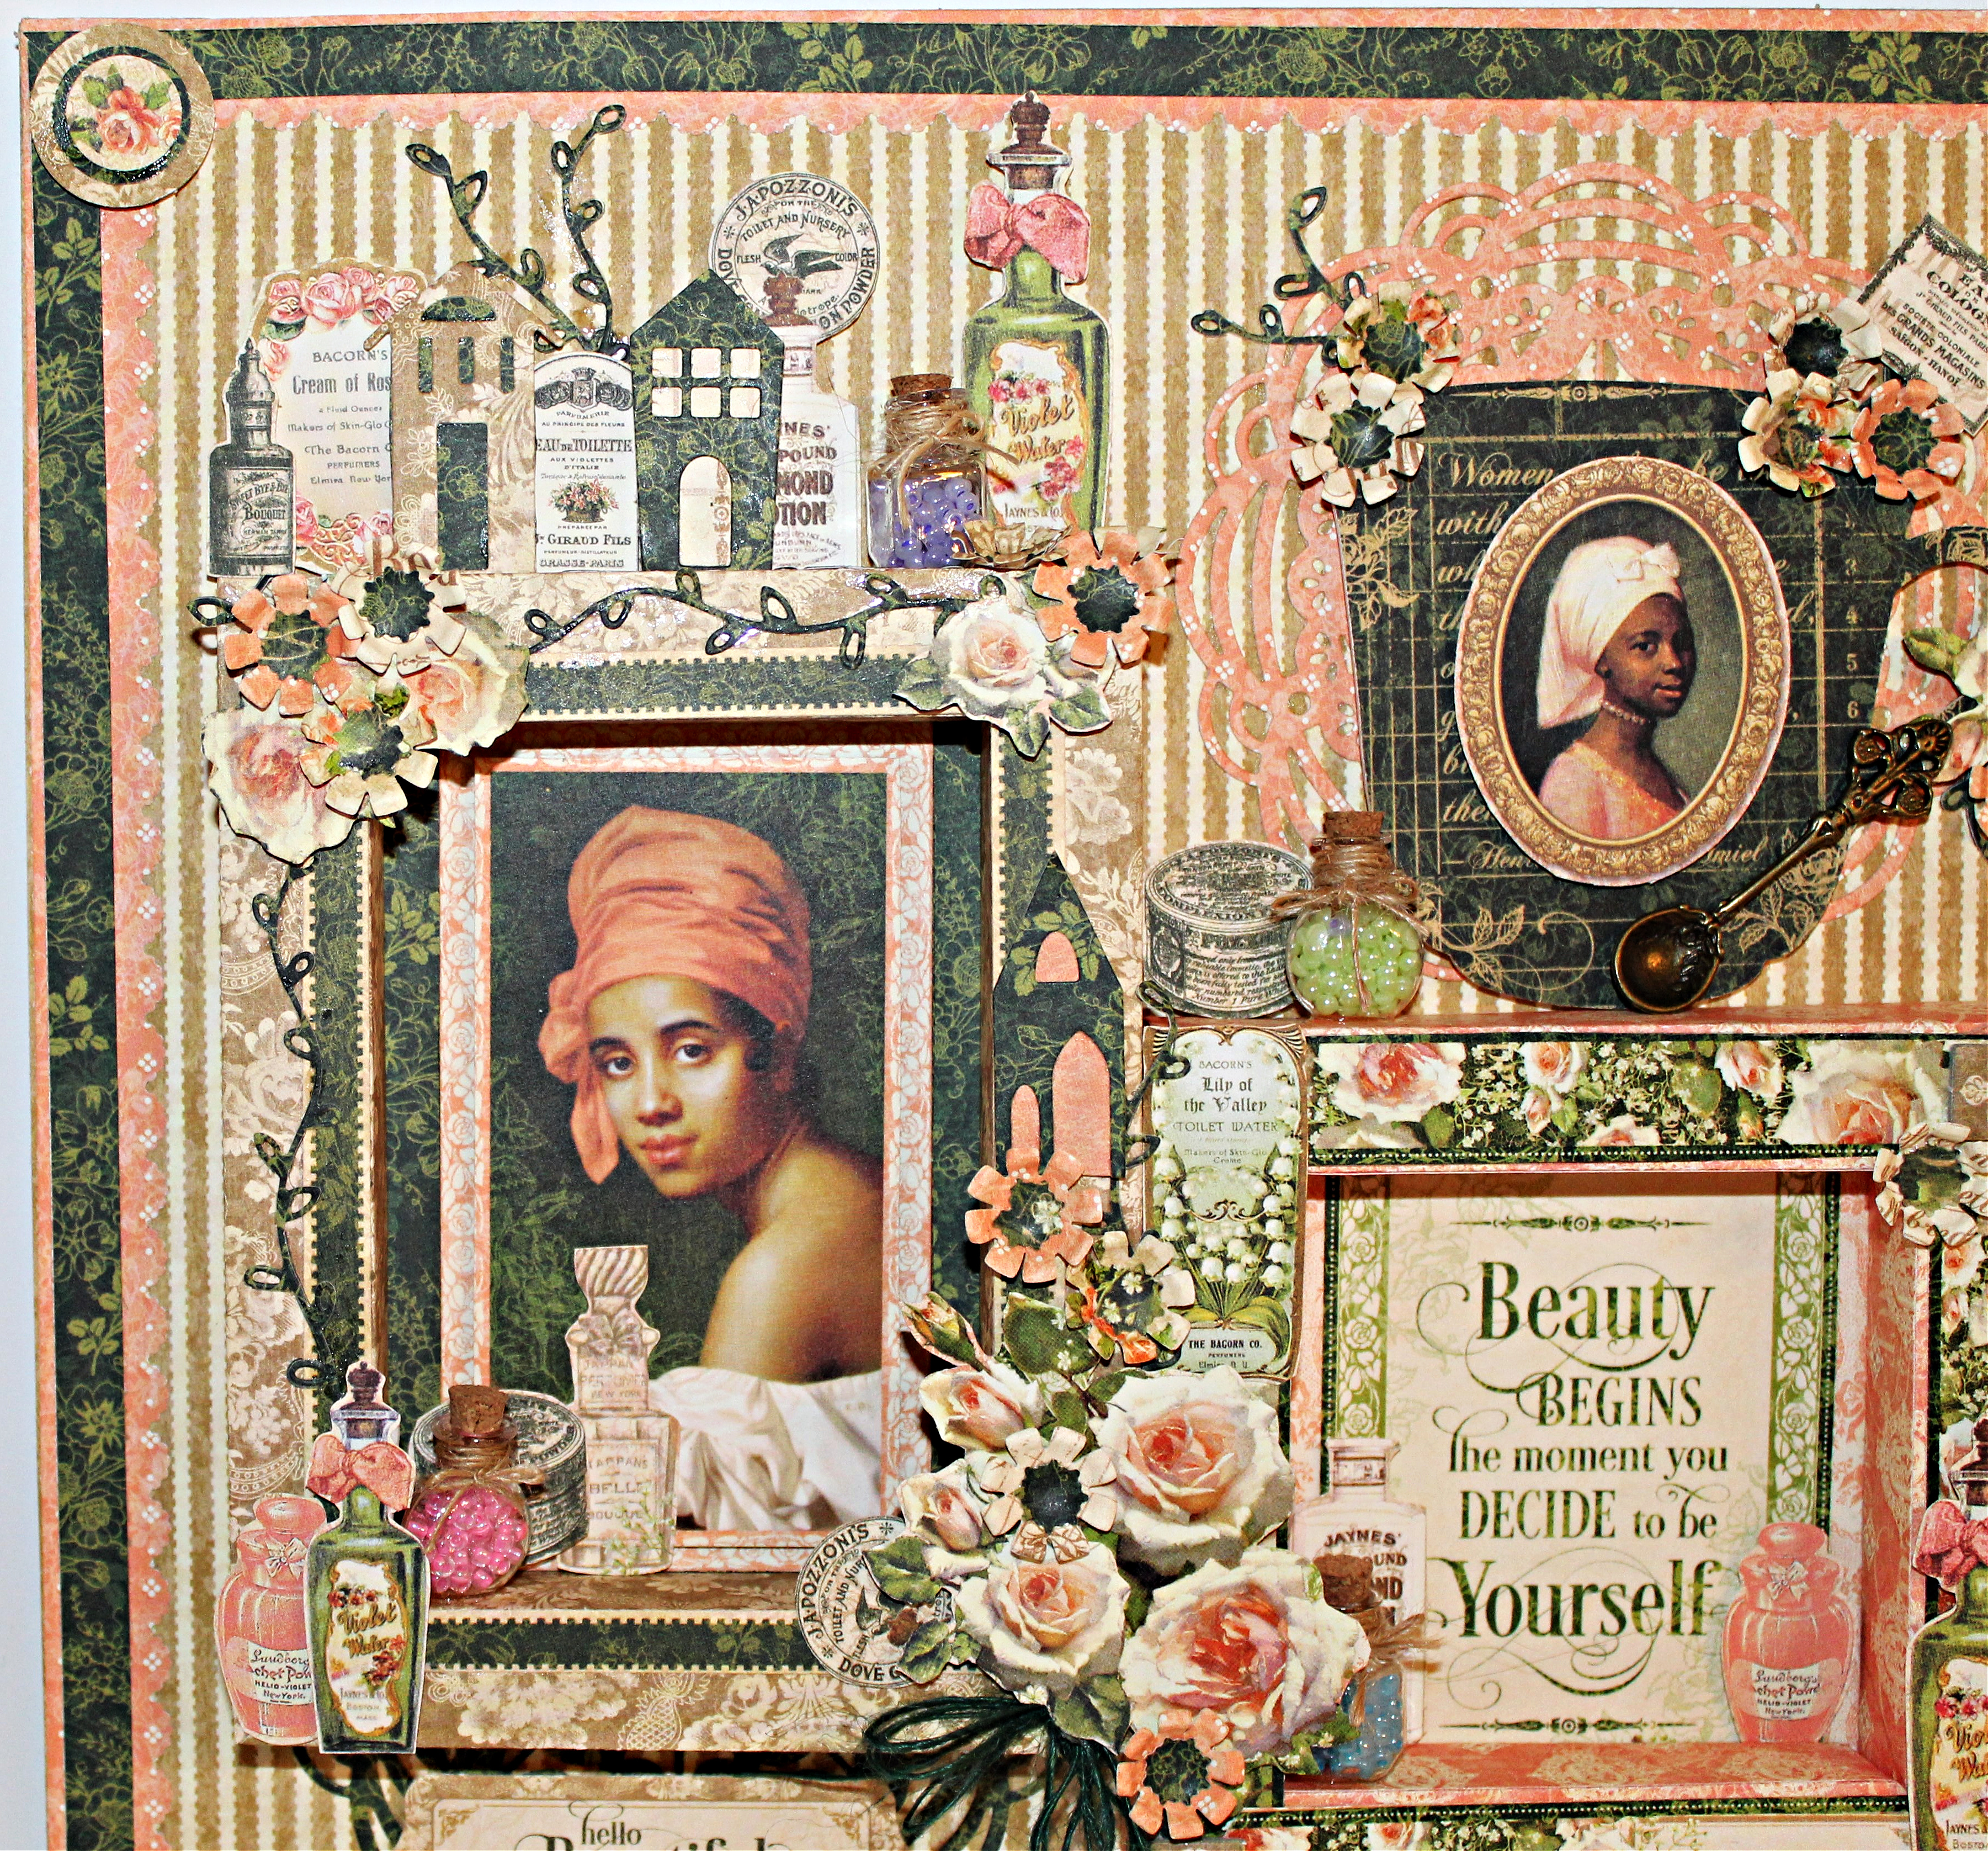
Beautiful, You Wall Art 
Wall Art at times feels so intimidating but Eileen Hull Chapter 2 Shadow Box dies along with the Shadow Box Element Dies make is so easy to create. 
Wall Art pieces are so easy to create and a wonderful gift idea throughout the year. 
YOU JUST START WITH A PIECE OF 12 x 12 CHIPBOARD
AND 
YOUR FAVORITE PAPER COLLECTION! 


Begin by covering chipboard with pattern paper. 
Add small circles that have been punched out and layered to each corner. 
Die cut two of Mandala Embossing Folder; run through the Xyron Creative Station Lite and add to project. 


Die cut ShadowBox Frame from pattern paper; create frame. 
Adhere a top of an Ephemera Journal piece. 
Add fussy cut pieces to frame. 


Repeat with a second frame using the ShadowBox Frame
(The ShadowBox Frame will create different size frames depending on how they are placed together.) 


Adhere to prepared wall art. 


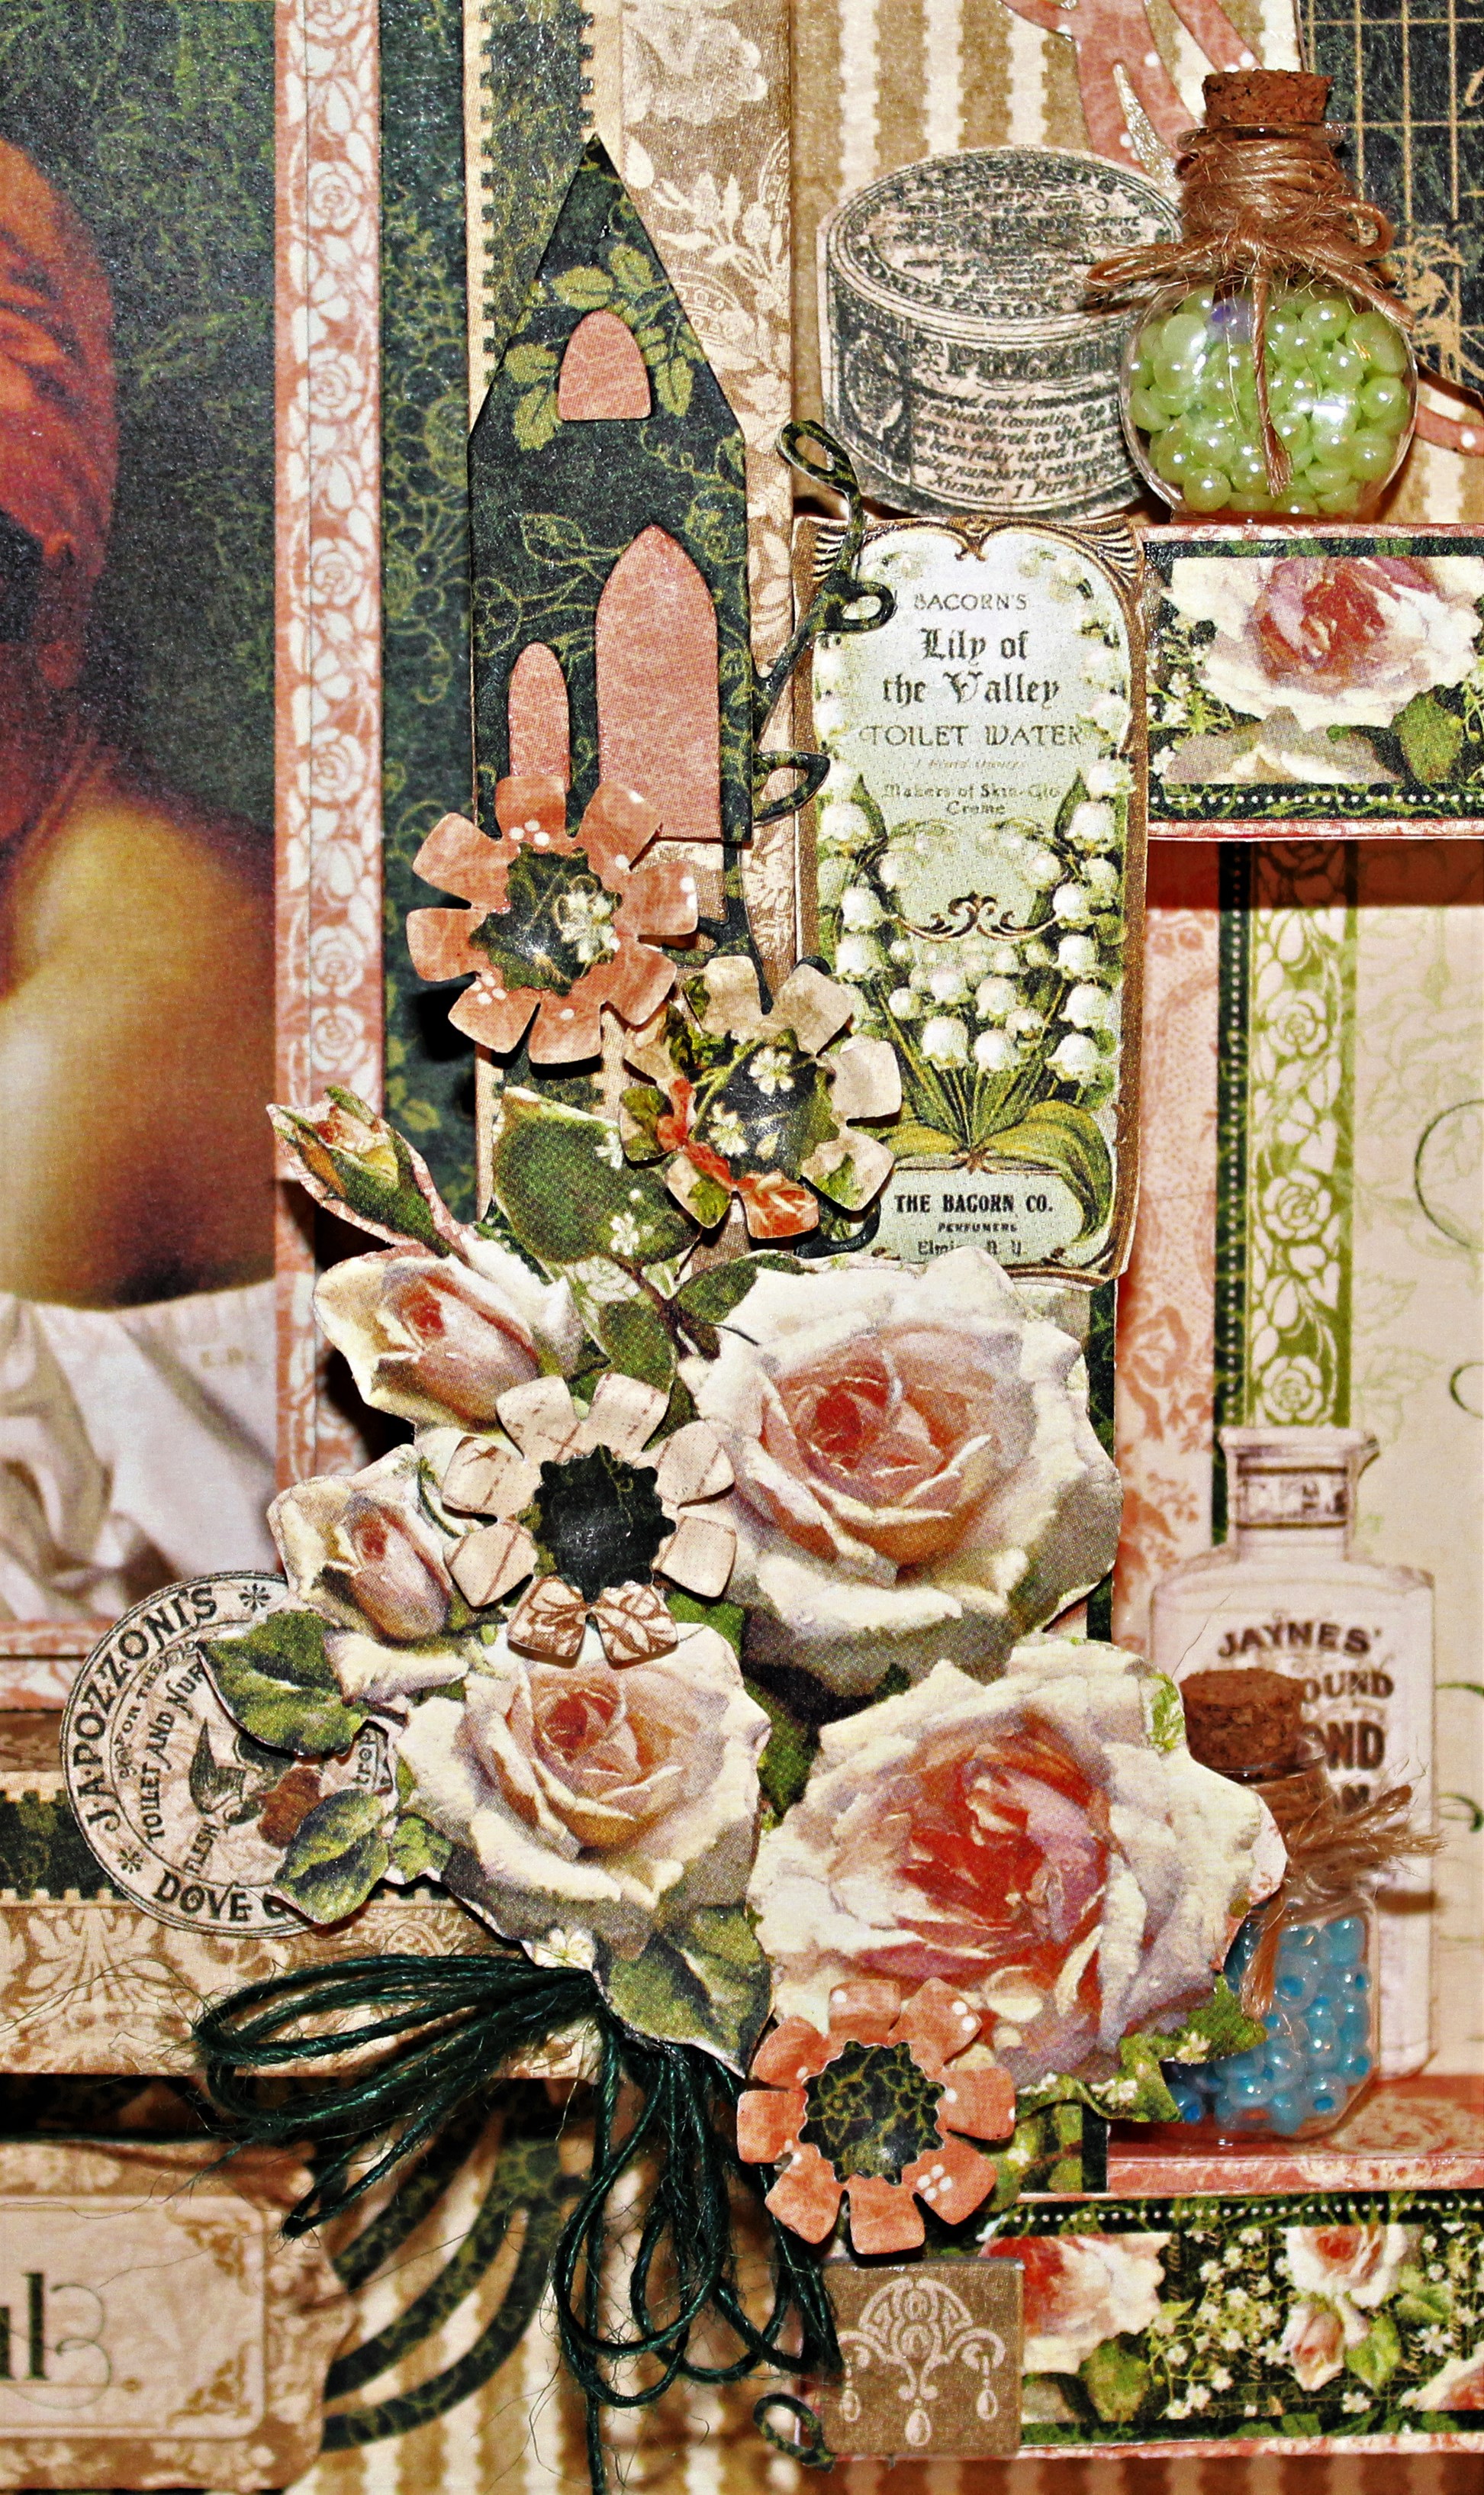
Adhere fussy cut flowers along with pieces from the ShadowBox Elements,
Add twine bow and sentiment under frame. 


Add small jars filled with fun shaker pieces. 
Adhere to frame.


Fussy cut elements from pattern paper and die cut pieces from the ShadowBox Elements
Add to top of rectangle frame; placing some with pop dots to create dimension. 


Die cut Teacup and Spoon Die from pattern paper; add small photo to center of cup. 
Decorate the cup with die cut pieces from the ShadowBox Elements.
Add small metal spoon in front of cup.


Add a few more jars to wall art. 


Thanks for stopping by today and hope you are inspired to create wall art throughout the year using Eileen Hull dies from Sizzix! 
Enjoy Pam

Supplies:
Graphic 45 Portrait of Diary
12 x 12 Chipboard
Small Jars
Shaker Elements
Metal Spoon
Natural and Dark Green Jute
Flowers
Xyron Glue Gun with Glue Sticks
Xyron Creative Station Lite with Permanent Adhesive

Make sure to stop by Eileen Hull's Blog to check out all the fabulous projects created all month long by the teams!
ALSO...
WON'T YOU COME JOIN US!!!
Lots of eye candy, fabulous tutorial, etc.
Best of all you don't want to miss Eileen's Live Shows!
Always so much fun!

I know you will truly be inspired! 
Enjoy Pam


DISCLAIMERS
This blog is compensated to provide opinion on products, services, websites, and various other topics. Even though the owner(s) of this blog receives compensation for our posts or advertisements. I always give my honest opinions, findings, beliefs, or experiences on those topics or products. The views and opinions expressed on this blog are purely my own. Any product claim, statistic, quote or other representation about a product or service should be verified with each manufacturer, provider, or party in question/This blog contains affiliate links, clicking and shopping through these links helps to support and run Pam Bray Designs - Scrapbook Flair Blog at no additional cost to you. Today's features are Eileen Hull Designs Products with Sizzix