Showing posts with label Tombow. Show all posts

Saturday, June 18, 2022

Sweet Summertime Mixed Media Art Pages


Sweet Summertime Saturday!!!
Art journaling at its best. 
Relax, Refresh and fun drinks!
Are you ready?


Begin your art journal pages by applying gesso to pages, dry!
REMEMBER... 
this will help your watercolors and other mediums to flow easily. 


Lay Solar Flare Stencil apply crackle paint to top of prepared pages, dry. 
Apply tropical watercolors on prepared pages, dry. 
Stamp background images to page using ink. 


Stamp Surfboard with Floral Stamp on rice paper, fussy cut out. 
Adhere to prepared page with gel medium
Using watercolor paint and markers paint surfboards, dry. 
Write "Sweet" at top of page with pen. 
Write "Relax and Refresh" near surfboards with black pen. 


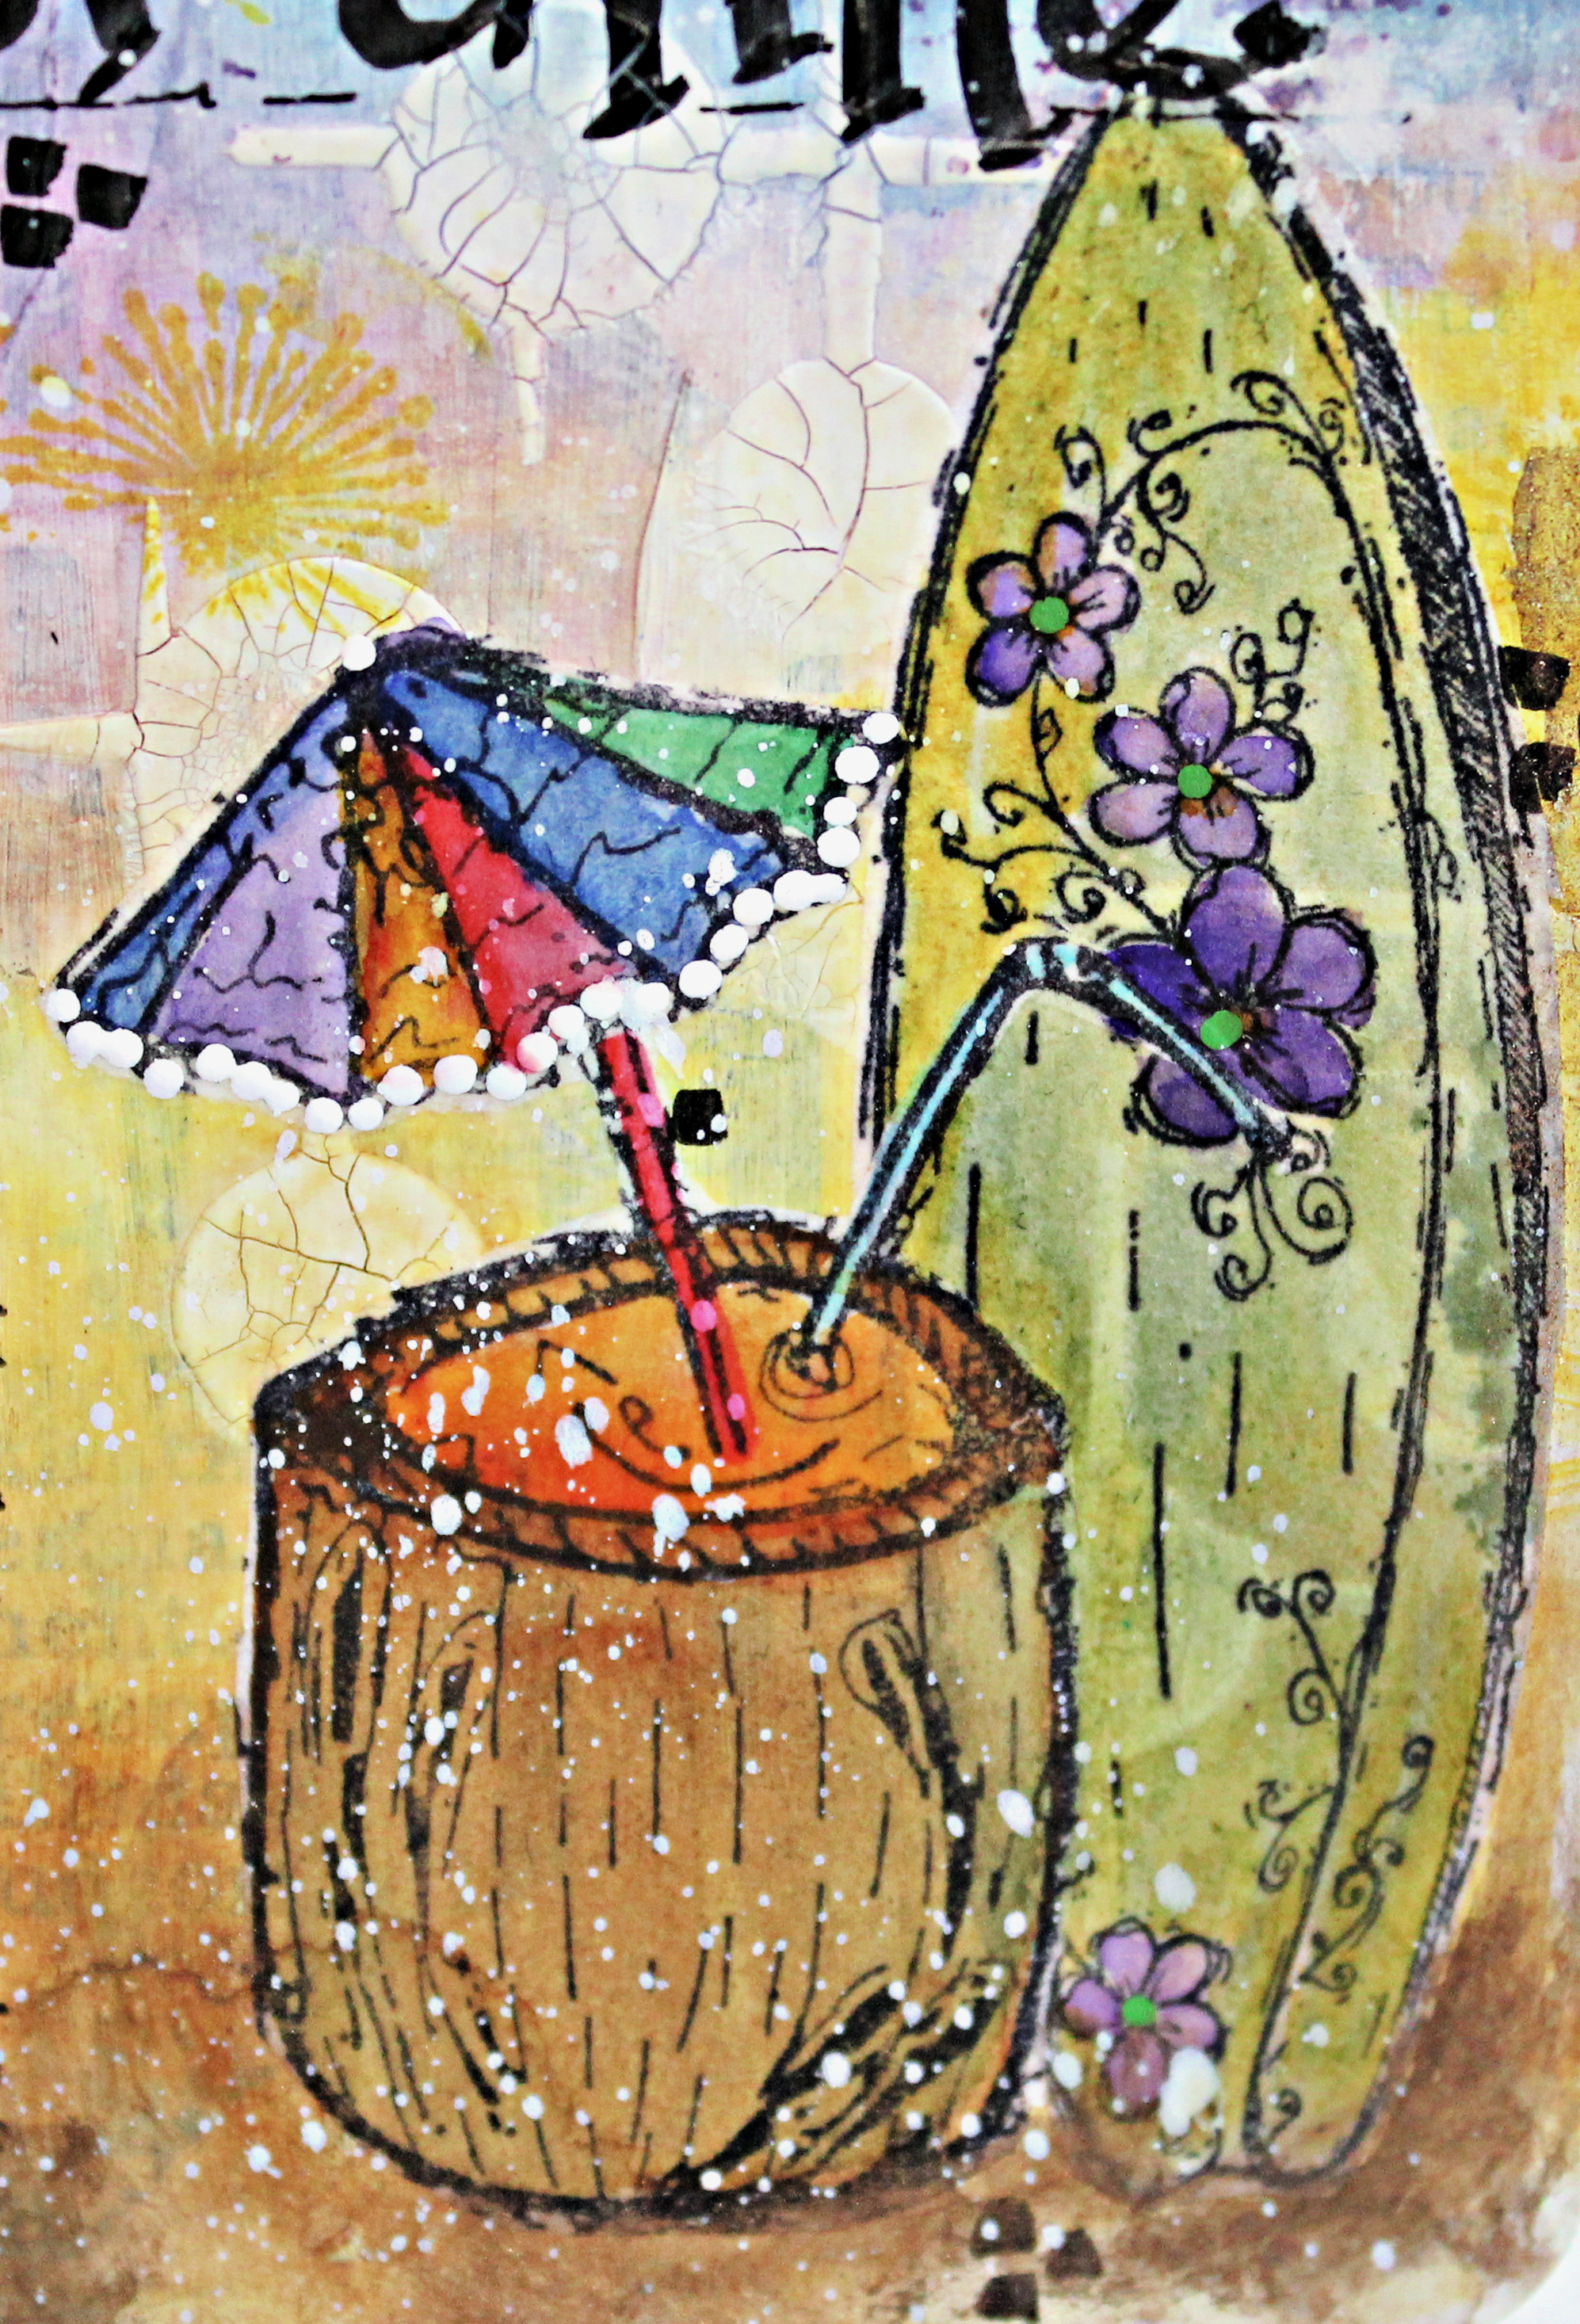
Create second page by stamping Tall Tropical Drink Stamp and Surfboard with Floral Stamp on rice paper.
Adhere to prepared page with gel medium
Using watercolor paint and markers paint surfboards, dry. 


Write "Summertime" at top of page with black graphic pen. 
Add small squares to pages with black graphic pen. 


Draw rectangle using ruler black pen.
Doodle around edges of rectangle with black pen.  


Add your favorite sweet summertime beverage recipe inside rectangle with black pen. 


Add Lindy's Bratwurst Brown Magical powder to bottom of page using water and paintbrush. Dry
Spatter with gesso. Dry. 
I hope you enjoy this Saturdays Art Journal Mixed Media Pages. 
Make sure to check out my previous art journal pages here on my blog or You Tube Channel. 
Enjoy Pam

Supplies
Arteza Watercolor Sketchbook
Lindy's Magical Bratwurst Brown Shaker
Deco Art Gesso
Liquitex White Gesso, Clear Gesso, Gel Media
Rice Paper
Tombow Watercolor Markers
Pigma Graphic Black Pen #2
Pigma Micron Black Pen #2
Ranger Archival Jet Black Ink, Dusty Concord Distress Ink
Paintbrush
Water Misting Bottle with Water

Sunday, May 29, 2016

A Brand New Start Card with Tombow

 I am sharing my "A Brand New Start" card using the Irojiten Color Pencils.
 To create the background of the card....
Color a piece of white card stock using INROJITEN Color Pencils. 
They are a premium colored pencil crafted with cedar wood and hard, dense lead. 
They are a strong pigment with vibrant pigment with crisp colors when blending colors.
Premium colored pencils crafted with cedar wood and hard, dense lead for precise details and sharp lines. Perfectly centered lead core is adhered throughout the wood casing for break resistant, evenly sharpened lead. Strong pigment for deep color saturation that stays crisp and vibrant when blending and layering. White enamel finish offers a comfortable, fatigue free surface when holding for long periods. Colored pencil eraser cleanly removes colored pencil markings and can be used to create highlights. Set includes 12 colored pencils, sharpener and colored pencil eraser. Available in two pre-sorted color selections – Vivid and Tranquil. - See more at: http://tombowusa.com/craft/pencils/irojiten-adult-coloring-set-tranquil.html#sthash.VF4uqjG0.dpuf
 Once the background is colored in ombre shades of the Irojiten Color Pencils stamp the sentiment and butterflies on prepared background. 
Stamp second butterfly on white paper and color with Irojiten Color Pencils. 
Fussy cut out second butterfly.
 Emboss prepared background paper with embossing folder. 
Distress edges with distress tool and brown ink. 
 Adhere prepared card stock and prepared background paper to top of card base. 
 Adhere second butterfly to the top of first at body. 
Fold wings up.
Love the soft and faded background texture that was created from the Irojiten Color Pencils.
I hope you enjoyed my super easy way to create a fun background paper using your Irojiten Color Pencils. 
Tombow offers two sets of twelve of the Irojiten Color Pencils, one in Vivid Color and one in Tranquil. 
Make sure to check them both out HERE!!!

 Supplies:


Tombow Brand Ambassador
I’m so happy to be a Tombow Brand Ambassador and help promote their wonderful products. They so generously supply me with some  fabulous to work with like those that I’m using today.
Follow Tombow USA
Facebook 
Store 
Blog  
Twitter 
Pinterest

 photo PB Signature.png

Thursday, February 18, 2016

Celebrate with Tombow

 CELEBRATE !!!!
I just became a Tombow Brand Ambassador!!!
 My first package had Tombow Mono Removable Adhesive and Mono Correction Tape in a pretty container.
I created my Celebrate Card using Tombow Mono Removable Tape and Double Sided Adhesive Dots along with Simple Stories Hope Collection. 
I began by first using the Tombow Mono Removable Tape on the backside 
of  pattern paper and doily die cut to determine the placement of my paper pieces. 
BUT OOPS!!!!
I forgot to trim the doily off before I placed in on the front of my card base 
and was glad I had used the Mono Removable Tape. 
That is the fabulous thing about the Tombow Mono Removable Tape 
 it is made for you to be able to place your pieces down and move them around.
Trim the doily....
to the pieces and reset them to the card front.
For the inside of the card...
form a pocket...
Apply Tombow Mono Removable Adhesive Tape to the bottom and two sides
and position inside card to form a gift card pocket. Once decided, 
 remove and add Double Adhesive Dots to pocket and place back inside of card. 
Place gift card inside using Tombow Mono Removable Adhesive Tape.
Die cut flowers from pattern paper. 
Place together using Tombow Double Adhesive Dots to back of flower pieces. 
Stack together. 
Place on card front.
Emboss "Celebrate" to paper. 
Mat together using the Tombow Double Adhesive Dots.
Place "celebrate" to card front using Tombow 3D Foam Tabs.
Die cut leaves, add to front of card using Tombow Double Adhesive Dots.
Add bow to card front using Tombow Double Adhesive Dots.

Tombow Supplies:

Other Supplies:
I’m so happy to be a Tombow Brand Ambassador and help promote their wonderful products. They so generously supply me with some  fabulous to work with like those that I’m using today.
Follow Tombow USA
Facebook 
Store 
Blog  
Twitter 
Pinterest
UTube
Google

Friday, February 5, 2016

Imagine Needle Book with Stampendous and Tombow

 It is so fun to "Imagine" all the fun things that 
the Stampendous and Tombow Teams will be doing this week.
I am so excited and can't wait to hop through the blogs.
 I began by first die cutting a needle book.
 Stamp the both sides using the black ink and image. 
Spray both sides with yellow mist.
Allow to dry completely.
 Apply distress ink using blending tool to both sides and latch.
 Cut and score pattern paper to fit inside book.
 Stamp butterfly image twice on pattern paper using black ink.
Apply distress ink to top of stamped butterflies.
 Using Tombow Glue Pen, apply glue. 
Sprinkle fine glitter to top.
Allow to dry completely. 
Fussy cut both butterflies out. 
Adhere at the body of butterflies with Tombow Glue Pen. 
Dry completely.
 Cut a Tombow Fastner Tab to fit latch. 
Place on latch.
 (Here is a closer look at the Tombow Fastener Tab open)
 Add prepared butterfly to top of book. 
Adhere metal arrow to body using Tombow Glue Pen.
 Tie pages in with red twine.
Add a metal word to the twine.
 Glue a small gear to top of latch with Tombow Glue Pen.
I am so glad you stopped by to check out my Imagine Needle Book using fabulous products from Stampendous and Tombow!!!
I hope you are enjoying all the projects that are being shared by the 

Hugs 
Pammejo
Stampendous Supplies:
Other Supplies:
Stampendous/Dreamweavers Design Team
I'm so happy to be a Stampendous Design Team Member and help promote their wonderful products. They so generously supply us with so many free goodies like this .... Stamps, Embossing Powder, Ink, Stamp Blocks, Paper that I'm using today.
Follow Stampendous