Showing posts with label Chipboard. Show all posts

Wednesday, June 30, 2021

Liberty Home Decor Wreath with Xyron


Let Freedom Ring!!!
What better way to celebrate but to create a fabulous Home Décor Wreath!
Super easy to remake with Xyron products!


Begin by running a 9" circle through the Xyron Creative Station with Permanent Adhesive 


Add pattern paper to adhesive side of chipboard. 
Trim edges of pattern paper from chipboard circle. 


Repeat prepared wreath again by placing paper side up and running through Xyron Creative Station with Permanent Adhesive .


Place adhesive side down on pattern paper.


Trim just the outside edge from chipboard. 


Create Americana bow using May Arts red, white and blue silk ribbon. 
Adhere to front of prepared wreath using Xyron Mini Glue Gun.


Punch or fussy cut stars from pattern paper; run through 


Add stars to wreath along with fussy cut images from pattern paper using Xyron Mega Runner.


Add a few rusty metal stars to wreath to give added dimension.


Add sticker banner to wreath with pop dots. 


Using Xyron Mini Glue Gun add I AM Roses Red, White and Blue flowers to prepared wreath. 


I hope you have fun creating either a Fourth of July Wreath or other special wreath through the year using you favorite Xyron products!!! 
HAPPY FOURTH OF JULY!!!
Enjoy Pam

Supplies:
May Arts Red, White and Blue Silk Ribbon
Authentique Liberty Collection
I AM Roses Red, White and Blue Flowers
Star Punch
9" Circle Chipboard
Rusty Metal Stars
Pop Dots

 DISCLAIMERS

This blog is compensated to provide opinion on products, services, websites, and various other topics. Even though the owner(s) of this blog receives compensation for our posts or advertisements. I always give my honest opinions, findings, beliefs, or experiences on those topics or products. The views and opinions expressed on this blog are purely my own. Any product claim, statistic, quote or other representation about a product or service should be verified with each manufacturer, provider, or party in question/This blog contains affiliate links, clicking and shopping through these links helps to support and run Pam Bray Designs - Scrapbook Flair Blog at no additional cost to you. Today's features are XYRON Products.

Wednesday, March 13, 2019

Homemade Recipe Book With Authentique


Hello Authentique Fans! Pam here today sharing my Homemade Recipe Book! There are so many special occasions right around the corner and for us it is a wedding! What better way to celebrate but by creating a special gift. I create a recipe album  to give to my new daughter-in-law to welcome her to the family.


Chipboard Book Pattern 
I included a pattern for you to re-create your very own album or albums with. There are 3 chipboard pages with tabs on right side and 2 holes on the left side. The pages each measure 10" from the left to right including the tabs and is 6" wide.

Cover the cover with Authentique Ingredients pattern paper and border strips. Add paper doily to front.


Add sticker to top of pattern paper; fussy cut around image and add to front with pop dots.
Adhere small metal knife to top of sticker. Fussy cut Ingredients Epherema image from paper. Adhere to front of cover. Repeat with second image; add to top with pop dots.


Add small metal fork and spoon to front cover. Adhere flowers and twine bow to top of cover.


Page 1
Cover Page 1 with Authentique Ingredients pattern paper and border strips.


Trim and fold 3 recipe cards; add to front of pattern paper mats. Adhere to top of page 2.


Add small metal clips to hold recipe closed. Add stickers to each of the folded recipe cards. Add pattern paper stamps to bottom of Page 2 with pop dots.


Page 2
Cover page 2 with pattern paper and border strips. 


Create pocket to measure 3 1/2" x 7". Add pop dots to the sides and bottom; add to page front to form pocket. Adhere border strips, Epherema pieces and Stickers from the collection. 


Cut 6 Recipe Cards from the Ingredients pattern paper; punch small hole. Add ring to hold together.


Add prepared recipe ring to pocket on page.


Scallop punch Epherema image from Ingredients pattern paper; add to top of pocket with pop dots. Add "Delicious" sticker to tab.


Page 3
Cover Page 3 with pattern paper and border strips. 


Create book to measure by cutting six pieces of 5" x & 7 1/2" using Authentique Ingredients pattern paper. Staple six cut pages together on the right side with stapler to create book.  Cut one 2" x 5" piece of pattern paper; fold in half. Add to staple book to form bind. Add border strips and gemstones to book. 


Decorate front of book with doily, border strips, metal spoon, tag along with stickers and ribbon.


Fussy cut "Divine" Epherema Card from pattern paper. Add to tab with pop dots.


Add 4" x 6" Recipe Cards to each page. Hold open with clip.


Page 4
Cover Page 4 with pattern paper and border strips. 


Create pocket measuring 4 1/2" x 6 1/2". Add Epherma card from pattern paper to top. Add to prepared piece to page by adding pop dots on the top, bottom and right side to form pocket. 


Die cut 6 Recipe Cards from pattern paper using die. Adhere to die cut Recipe Cards to front and back of 3 Kraft tags. Decorate each tag with border strips and stickers. Tie together with ribbon to form tag book.


Place tag book into pocket. Add small metal fork and knife to top of pocket along with a fussy cut rolling pin from Epherema Card that is placed on with pop dots.


I hope you are inspired to re-create a few chipboard albums throughout the year with Authentique fabulous collections. Enjoy pam

Supplies:
Authentique Ingredients Collection
Graphic 45 Tag Die
Graphic 45 Kraft Tags
Chipboard Slide Album
Xyron Creative Station with Permanent Adhesive
Ribbon
Metal Spoon, Fork, Knife, Clips and Rings
Gemstones
Stapler
Pop Dots

(Disclaimer Notice: I’ve received products/compensation as part of the Authentique Design Team. This project however, is 100% my own project! Some of the links in this post are affiliate links. I explain more here.)


Wednesday, January 9, 2019

LOVE...You and Me Card with Southern Ridge Trading Company


Hi Southern Ridge Trading Company Fans! 
Today I am sharing my LOVE…You and Me Card! 
I am using fabulous "love" chippies from the Southern Ridge Trading Company store!!!
 Can you believe Valentines Day is less than a month away...
 BUT...
 my card would be fabulous for any celebration that you would want to send some "love" to someone! The best part it is super easy to recreate with any paper collection!


Adhere pattern paper and die cut doily to top of 5 1/2" x 5 1/2" Kraft base.


Emboss Love WordAbstract Heart Frame, and Demask Corners using Emerald Creek Supplies embossing powders.


Adhere prepared Abstract Heart Frame to top of Epherema Card.


Adhere to top of card along with the prepared Love Word and Demask Corners.


Add small enamel dot to corner of card.


Adhere small flowers and twine bow to corner of embossed heart.


Mat "You and Me" Epherema Card to black card stock. Add to top of card with pop dots.
 I hope you are inspired to check out all the chippies in Southern Ridge Trading Company Store to create some fabulous cards through the year. 
Hugs Pam


Supplies:
Southern Ridge Trading Company Love Word
Southern Ridge Trading Company Abstract Heart Frame
Southern Ridge Trading Company Demask Corners

Other Supplies:
Authentique Romance 6" x 6" Paper Pad
Emerald Creek Craft Supplies Sweet Valentine Embossing Powder
Emerald Creek Craft Supplies Weathered Wood Embossing Powder
Scallop Die
Enamel Glitter White Dot
Black Card Stock
Tan Twine
Small Craft Flowers
5 1/2" x 5 1/2" Kraft Card Base
Adhesive
Pop Dots

DISCLAIMER

This blog is compensated to provide opinion on products, services, websites, and various other topics. Even though the owner(s) of this blog receives compensation for our posts or advertisements, I always give my honest opinions, findings, beliefs, or experiences on those topics or products.The views and opinions expressed on this blog are purely my own. Any product claim, statistic, quote or other representation about a product or service should be verified with each manufacturer, provider, or party in question. This blog contains affiliate links, clicking and shopping through these links helps to support and run Pam Bray Designs - Scrapbook Flair Blog at no additional cost to you.

Thursday, May 24, 2018

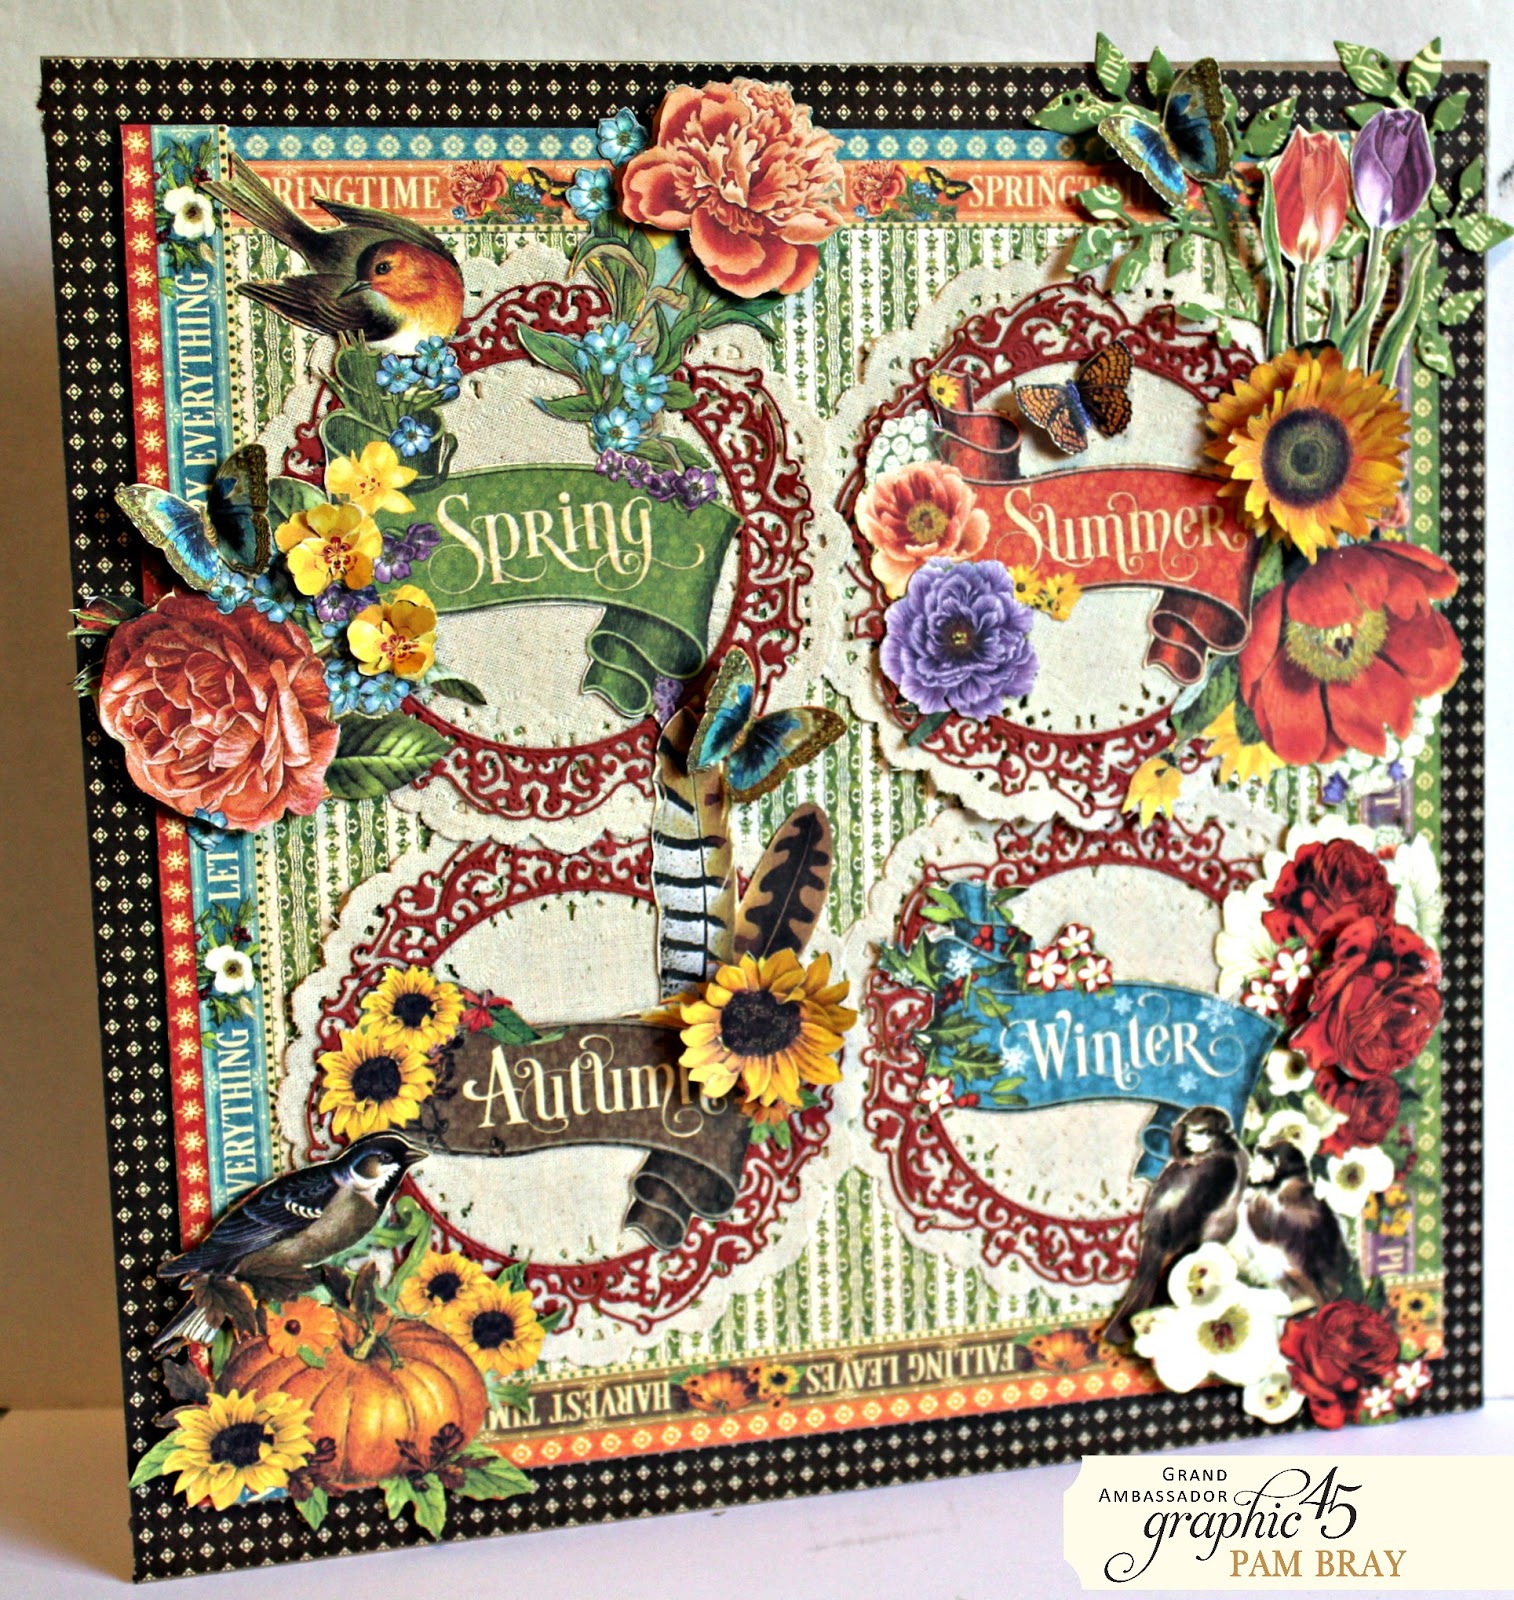
Through the Seasons Frame with Graphic 45


“It is a sad day for me…. two years and through two sets of Seasons I have enjoyed and loved every minute of being part of the Graphic 45 Team/Family!!! I will never forget the morning two years ago when I woke up to all the congratulatory post, emails and text! I thought I was dreaming when I saw my name on the Graphic 45 Team list and still keep pinching myself over the opportunity to be able to design for such a fabulous, loving and creative company.  The Graphic 45 designers are all so wonderful and I love the new friendships that I have made with them and with the Graphic 45 community!  I say goodbye to being a Design Team member but I will always consider myself part of their family, so they aren't going to get rid of me easily, lol! It has been an amazing, creative journey and I feel so honored and privileged.  Make sure to follow me as I continue my creative journey and will share my creations with them and you.  Thank you Graphic 45 for such an amazing, creative time!” Pam

“I love taking chipboard and creating frames. My last post for the Graphic 45 Design Team I am going to share an easy chipboard frame. You will need a piece of 11” x 11” and 10” x 10” chipboard to create the “Through the Seasons” Altered Frame. What better way to finish by term with the Graphic 45 team but to celebrate the seasons …they went by quickly and this project will be quick to recreate. “Pam


Cover chipboard with pattern paper to create frame pieces 


 Adhere together. Add border strips from each center to side of smaller chipboard frame. 


Die cut doilies from paper; adhere to top of doilies. Add to top frame.


Fussy cut each season images from pattern paper adhere to each of the doily frames


Continue until four seasons are on frame.


Fussy cut second images from pattern paper; add to top of frames with pop dots.


Supplies:
Graphic 45 12” x 12” Season Paper Pad
Graphic 45 12” x 12” Winter Wonderland Strips and Patterns Pad
Graphic 45 Tag and Clock Die
11” x 11” Chipboard
10” x 10” Chipboard
4 ½” Paper Doilies
Xyron Tape Runner
Xyron Creative Station with Permanent Adhesive
Pop Dots